Google Places 101 ‑ A Guide For Local Businesses
Local businesses have long doubted the possibility, if not the potential, of ranking favorably for geo-modified keyword phrases in the organic search results. In markets where competition is stiff and ahead of the curve, spending thousands of dollars for results that are anything less than guaranteed is reasonably unjustifiable. Likewise, PPC costs in these markets can be through the roof, costing small businesses upwards of $10-15 a click – a rate that bodes well for too few industries. While websites that are well optimized for conversions can turn these high-cost clicks into profit, it is often difficult for small businesses to stomach the costs of redesign and analytics that it takes to mold such sites. All things considered, it can be a trying, expensive endeavor for a small business to gain traction in the paid or traditional organic search results.
Enter Google Places, Google’s online local directory – an avenue through which all local business owners can (and should) pursue organic traffic for their websites. Know a local business owner? Own a business yourself? Great! The following post will walk you through the steps of setting up your Google Places listing, complete with tips for optimizing your listing for Google’s local search results. If you’re already familiar with the setup (and curious about the optimization exclusively), you’re welcome to skip ahead to Step 3.
1. Create a Google account for your local business/website.
Believe it or not, this is one of the most important steps in the process. Not only does your Google account enable you to claim your listing, but it also is the account that you’ll need to access if you wish to make any changes/updates to your Places page. Whether you’re the business owner or not, I recommend creating an account that’s specific to your business, rather than using a personal account. If the responsibilities of maintaining the listing or the business itself should ever change hands, you’ll not want to grant the new employee or owner access to your personal account. Trust aside, it’s just not something that’s preferable – for managerial, organizational, and personal reasons. Keep the login simple – something that’s easy to remember, but also sufficiently secure. I’d go with mybusinessname@gmail.com. That’s simplicity! Also, when creating your account, you have the option to specify an “other email address.” Be sure to specify an address that uses your businesses domain name, for example joe@mybusinessname.com. This is one more signal that helps Google trust the information you’ll provide in the following steps.
2. Claim your Google Places listing.
Once you have your account set up, it’s time to claim your listing. Go to the Google Places homepage, where you’ll see two options. For our purposes, we’ll be choosing the option on the right – Claim your business listing on Google – for free.
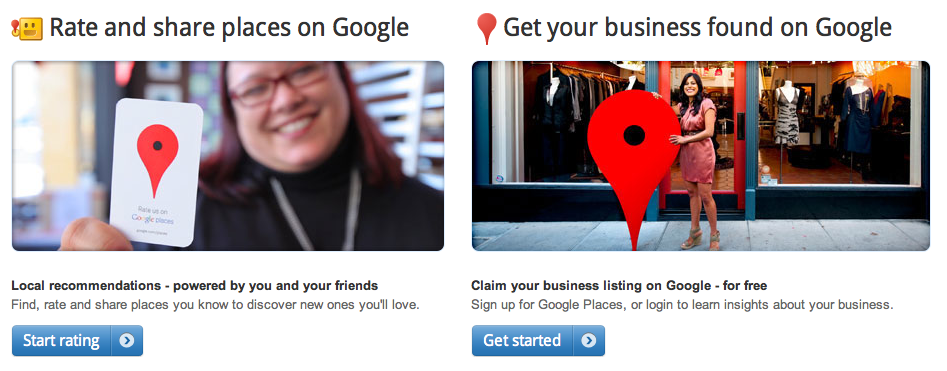
After you click “Get started”, you may be asked to log into your account once more. Kindly oblige to this additional step towards security and continue on. If this is your first time listing a business under the new account (which it likely will be), you should be directed to a page that prompts you to search for your business by telephone number. Enter your business land line (formatted like the one below), select your country, and click “Find business information”. Be mindful that, due to its integration with Google Maps, Google Places must be provided with a land line to associate or pair with a physical address. You should not use your personal or company cell number when completing this step. I’ll explain more about this later.

If Google was unable to find your business information (which is fine), you can move onto the next step. If it does, that’s generally fine, as well. In most cases, you’ll be able to edit and claim your existing listing (which may simply consist of basic information pulled from the various sources like InfoUSA, Yellowpages, etc.). In the rare case that someone else has already claimed your listing, you can either determine who has claimed it (if, perhaps, it was claimed internally) or claim it again.
3. Edit your Google Places listing.
This is where the bulk of the work gets done. First, I’ll address how to go about editing an existing listing (should that be the case). If your business is found, you should arrive at a screen like the one below, where you’ll see your business name, land line, and physical address. To edit your listing, simply click “Edit” on the right hand side. Don’t worry about verifying anything just yet; we’ll get to that in the next step.

Alright. Now it’s time to do the legwork that will serve as the foundation for our Google Places listings. Appropriately enough, this section will be a little longer than those before it; so hold on tight. This is like that 30-minute, touristy train ride at the beginning of the National Park that all the kids want to replace with “exploration”. You can go on and explore or stick around, learn, then explore. I’ll let you be the judge of which is more beneficial. Anyways, let’s get to it. While most of the sections of the listing are pretty self explanatory, I’ll outline the two that I find to be most pertinent to our listing’s ability to rank.
Basic Information
In this section, you’ll fill out some of the basic information about your business, including country, company name, street address, city, zip, etc. If you have a website, this is where you’ll enter the URL. One thing to keep in mind in this section (and throughout all of your online listings) is consistency. Consistency across multiple listings and seed channels is often considered to be one of the key determinants of search engine visibility for Google Places listings.
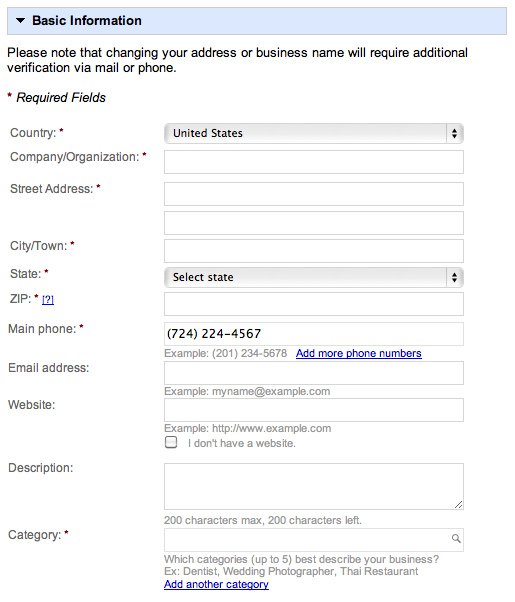
For instance, when filling out the Address field, something as simple as using the shorthand “Mulberry St.” , rather than the written form “Mulberry Street” is something that you should monitor for the sake of consistency. An integral component of a given listing’s ranking potential is the availability of information with which Google is able to triangulate validity. When moving from one seed site to the next (be it Yelp, Citysearch, Hotfrog, what have you), be mindful of any discrepancies between inputs – however minute they may be. Remember, when it comes to the inputs that are indicative of your physical location or contact information, the more consistent your listings, the better.
When typing up the description, you have 200 characters to describe your business. Use these 200 characters efficiently and effectively, maintaining a healthy balance of your targeted geo-modified keywords and usability. Do your best to include partial match keywords in your category selections, as well. You can choose to list up to five different categories (many of which are predefined).
Service Areas and Location Settings
In this section, you’ll specify whether your business operates out of one location or offers business/service to customers at their homes. If you choose the first option – “No, all customers come to the business location” – you’re essentially guaranteeing that the primary root location of all of your geo-modified key phrases will be the city/town in which your business is located. In selecting the second option – “Yes, this business serves customers at their locations” – you’re (perhaps) indicating that all towns within your scope should be given equal weight when tacked onto your key phrases as geo-modifiers. Makes sense, right?
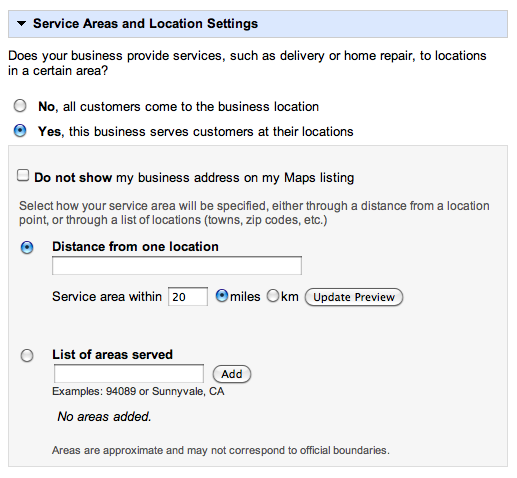
As far as determining your coverage area goes (for those of you who select the second option), you have two choices. The first – Distance from one location – allows you to specify a location and a radius (measured in miles). All areas within the circumference of the resulting circle are considered to be part of the coverage area. The other option – List of areas served – allows you to list specific cities/towns in which your business or service operates at the customer’s home. This is handy for those of you who don’t necessarily work within or without the confines of a given circumference with a defined center. It’s also useful for showcasing for Google the towns for which you’d like your listing to rank locally. In my mind, there’s a time and a place for each of these different options. Do your best to discern which will work most effectively for your type of business.
Other Information
It should be clear at this point that the Google Places listing requests a pretty comprehensive set of inputs and information. If I were to offer you one word to help you make your listing the very best that it can be, it would be ‘completeness’. Not only does completeness give your listing a better chance of ranking, but it also provides for the best user experience. Have pictures of your storefront? Upload them. Have a product review video or a 30-second television spot? Upload it. You get the idea. Substance is optimal. Make sure you have something for every field.
Once you’ve assured that your Places listing is both consistent with other online listings and ripe with completeness, you can proceed to Step 4.
4. Verify your Google Places listing.
Verification is a necessary step of listing your business on Google Places, and there are two methods for doing so. When you’re done editing your listing, click “Submit” at the bottom of the page. If everything is status quo, you’ll be taken to the verification screen, where you’ll be asked, “How would you like to validate your listing?”.
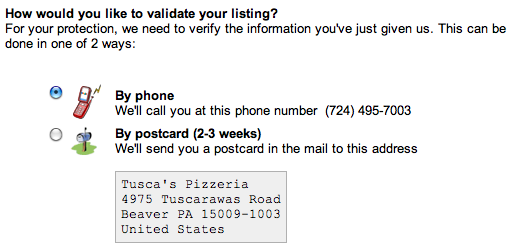
In most cases, you can choose from either phone or postcard verification. If you choose to verify by phone, moments after you click “Finish”, you will receive a phone call from Google’s automated machine at your business’s land line. When you answer the phone, the Google “bot” will read a 5-digit verification PIN, which you’ll need to write down. Simply input this 5-digit PIN under its respective business within your Places account, and voila – your listing is live. Verification by postcard replaces the phone call to your business address with the mailing of a postcard to your business address. The postcard (from Google) should arrive within two to three weeks of clicking “Finish” and contains the 5-digit PIN that you’ll need for verification. The downside to this method is obviously the time that it takes to get your listing live. While phone verification is almost always preferable (as it is instant), it is not always provided as an option.
5. Manage, maintain, & market your Google Places listing.
We’re at the end of the road . . . or are we? Once your listing goes live, it’s up to you whether or not you want to devote time and resources to managing, maintaining, and marketing it. Let me limit your options, here. DO IT. Take a few minutes every now and then to monitor your page.
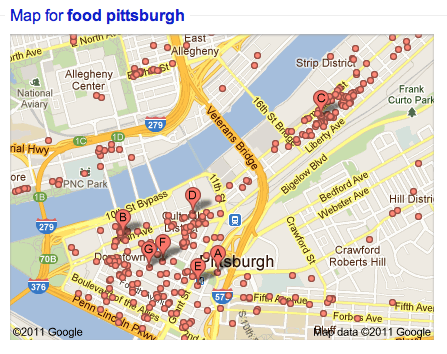
If you have Google Analytics set up on your business website, consider tracking traffic and conversions from users finding your listing through the local pin drop results. Encourage happy customers to leave reviews on your Places page. Post semi-frequent updates – including special offers and coupons. Build your online reputation by creating listings with other notable local directories, keeping consistency in mind throughout. The honest pursuit of these tasks, when coupled with an underlying quality of business or service, provide for a socially engaging listing that’s fit to rank well in location-specific results.
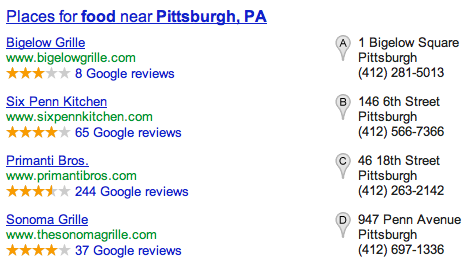
And so ends in brevity this guide to Google Places for local businesses. If you’re looking to learn more about specific ranking factors for local SEO, have a look at David Mihm’s Local Search Ranking Factors. That should give you some further insights into what it takes to rank for local queries. If you have any questions, comments, or tales of the Google Places you’ve been, don’t hesitate to share! In the mean time, have a safe, tremendous holiday.


