The New Features Of Facebook Timeline: A Guide For Businesses
Facebook begun rolling out Timeline for brand pages recentely, which presents many opportunities for brands to showcase themselves on Facebook like never before. The new format will be pushed live to everyone on March 30, but for now, you have time to get comfortable with the layout, add content and prepare for when you either choose to publish Timeline for your Page or hold out till March 30th. Here’s a comprehensive guide to all the new features Timeline for Pages offers your business with this new layout.
1. The Cover Photo: This feature is already well known among the Facebook community since it’s already incorporated as a feature of Facebook Timeline for Profiles. Now brands can use a Facebook cover photo at the very top of their Timeline to show a new, striking visual layer to their offerings the moment a fan lands on your Page. Is the cover photo the death of the Facebook landing page/fan gate? Most likely yes, but not just because of the cover photo but due to the removal of a default landing page when a user initially lands on your Page. More on this later in the article. When it comes to customizing your Facebook cover photo, crop a branded image to 855 by 320 pixels. Here are some other important dimensions for Facebook’s interface.

Burberry’s Facebook Cover Photo

Louis Vuitton’s Facebook Cover Photo

Zena Caffe’s Facebook Cover Photo
Take into account your now much smaller traditional profile picture and how this plays into your new cover photo. There’s been a lot of creative examples of cover photos over the last few months, so the opportunities are endless. Think outside of the box and make use of this worthwhile feature. Above are a few examples of cover photos from Pages that have made their Timeline live such as Louis Vuitton, Burberry, Canlis and Zena Caffè.
2. A Smaller Profile Picture: The height of the profile picture has drastically changed, therefore it’s time to change your photo as soon as possible to reflect the new format. The appropriate dimensions for a profile photo are now 180 x 180. Try using just your logo or another image that quickly summarizes your brand.
3. The About Section: The about section has long been a part of your Facebook Page, but now it’s more predominately featured at the top of your Timeline. It’s important that you update this section of your Timeline, depending on the which of the two versions of the about section applies to your Timeline.
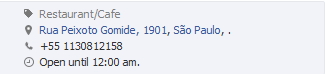
- About Section for Timelines with Physical Location: If your Timeline is associated with a physical location (categorized as a local business), then it will look like this. It lists any Place Sub-categories an admin previously defined, your address, telephone number and your hours of operation. Fill out any of the missing information by clicking on the section and add what’s missing.
- About Section for Timelines with no Physical Location: If your Timeline features a business without one physical location (your Page is not in the local business category), then it will look like this below. The section lets you add a description of your Timeline up to 255 characters. It’s important to be extremely clear and concise, giving first time visitors a clear understanding of what your Timeline is all about.

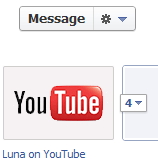
4. The Applications Banner: Replacing the photo banner at the top of the previous Facebook Page design, the new brands Timeline design highlights the applications added to a particular Timeline. The applications you previously had as tabs on the left hand side of your Page will now appear here on your Timeline in this banner. Admins can choose which applications to show in the 3 available slots in your banner. Choose the most important applications to be highlighted here, a custom application, videos, the public version of your Timeline insights and others. You can and should customize the image for each of theses applications as well by clicking on the pencil symbol on the application box, then edit settings to choose a new photo. These images should be 111 x 74 pixels. All your applications can be seen here at the top of your Timeline, but to access the others a user most click the drop down menu. It’s unlikely these hidden applications will receive the same amount of visibility because there’s another click required to view them. Therefore, be selective when choosing what to highlight in your application banner.

Butterfinger’s Facebook Application Banner at the top of their Timeline.
This is where your old fan gate/landing page application will now live, making it obsolete as a way of converting new visitors into fans because it won’t be the first thing that’s seen when you land on a Timeline. There’s no longer an option in the Admin settings to select a landing page, your Timeline is your permanent landing page. This is where the cover photo will pick up the slack in terms of a fan gate, although it’s still important to fan gate your other applications and content encouraging a user to like your Timeline before they can access it.
5. Turn On/Off Timeline Messages from Fan: Fans now have the ability to privately message a brand’s Timeline through the new message feature located at the top right hand corner of your Timeline, above the application banner. As an admin, you can choose to turn this feature on or off. One advantage or reason to turn this feature on is so fans can report issues to your Timeline privately, especially issues dealing with customer service concerns about your products or services. It’s a way to deal with negative feedback by keeping the conversation off of your public Timeline, but still on Facebook in a private setting. To turn it on go to the Admin Panel, Manage, Edit Page and then to Manage Permissions.
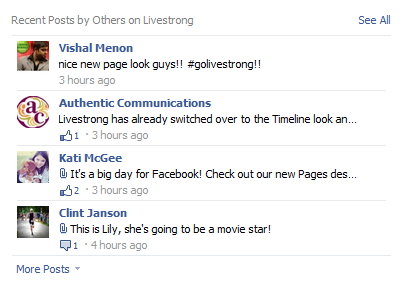
6. Choose to Hide the “Recent Posts by Others” Section: Timeline now features a section at the top right that highlights a list of recent postings from fans. It’s suggested that you leave this visible to help show engagement across your Timeline, but many Pages in the past have only chose to make their own posts front and center in the past, therefore they may continue to do this in the future by hiding this section. When you’re in Manage Permissions, you can turn off the section of your Timeline easily.
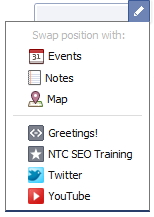
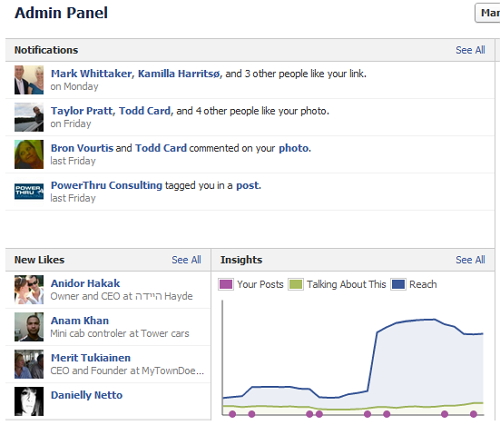
8. New Admin Panel Incorporates Notifications & Insights: Your Timeline notifications, insights, Timeline settings and private message inbox are all now available in one interface known as the Admin Panel located at the top of your Timeline, obviously only visible to admins. This new dashboard gives you a quick oversight over the 4 areas of administrating a Facebook Timeline and allows you to dive deeper into each section from here as well by clicking see all on the desired section. You can also invite your Facebook friends and email contacts to join your Timeline’s audience, as well as start a Facebook ad and use Facebook as your Page from here as well.
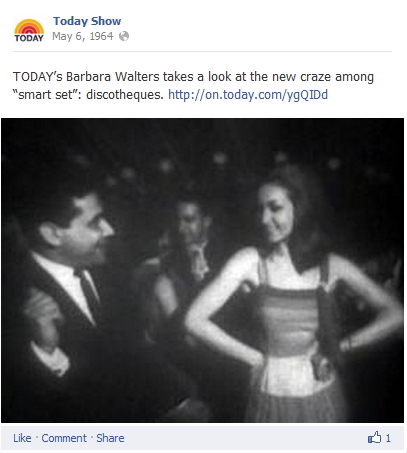
An example of a milestone, as added by the Today Show’s Timeline.
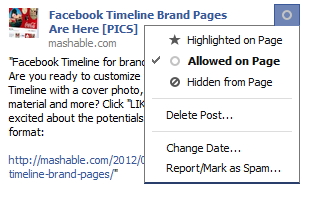
10. Pin Your Posts: Brands can now choose to pin particular posts to the top of their pages for up to 7 days. This makes it easier to highlight important, newsworthy topics to the top of your Timeline for longer promotion and visibility. Go to a piece of content on your Page, click edit and then choose Pin to Top to have this piece of content featured.
News & Insights
Related Perspectives