Google Website Optimizer Is Dead. Long Live Google Analytics Content Experiments
Until a few days ago we’ve had to keep this one under wraps, but with the official announcement on the Google Analytics Blog Friday we can finally talk about the all new Google Analytics Content Experiments. This is the all new, tied directly into your analytics, testing software to replace Google Website Optimizer. Google Website Optimizer will slowly be decomissioned over this year, and replaced fully by these new Content Experiments. So if your’e starting any A/B testing anytime soon, time to do it in here rather than in GWO.
Let’s do a quick run through on how to use and set up these new tests. It’s really simple, and A/B testing is something pretty much everyone is capable of doing, and should give a try.
The first screen below here is where you start. It’s under Content in the left navigation, and from there you’ll see “Experiments”. This brings you to the first page. The first step is to simply enter in the URL of the page you’d like to A/B test. Enter the original URL, so if it’s your index.php home page then put in www.mydomain.com/index.php for instance (Where obviously you’re replacing mydomain with your actual website domain.)
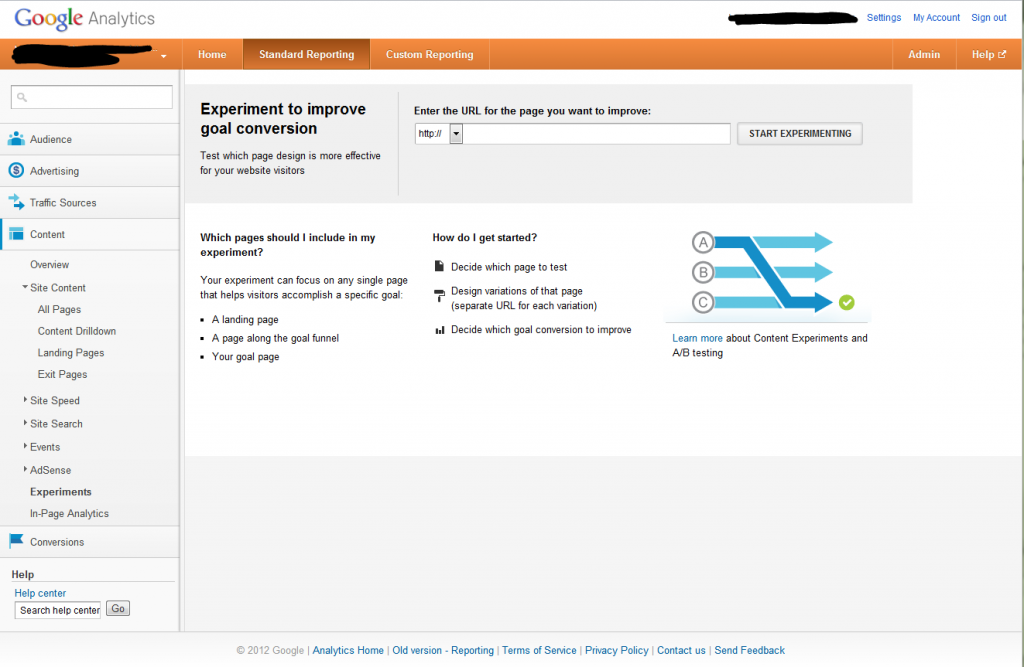
I’d like to test my “What are Content Experiments?” test page. I have a picture of a cute puppy, and a green button, but I don’t know how effective that is. How many more people could I get to click the button if it were say red, or orange. Or if I had a picture of a cat instead of a dog, or I dunno…. A manatee.

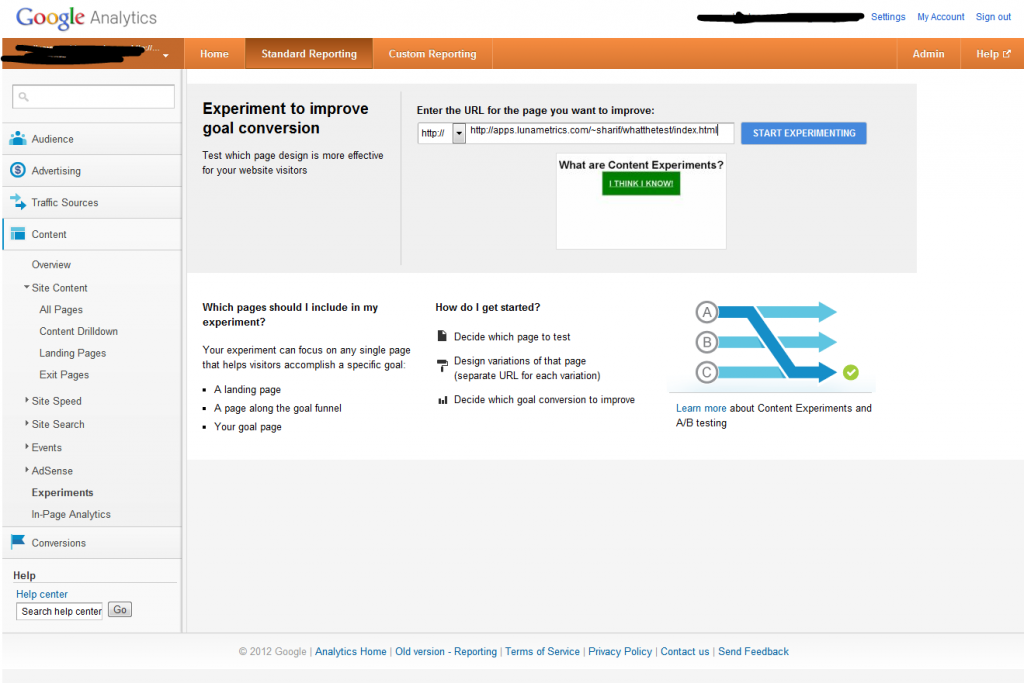
So I enter in my url, and a little screenshot shows up. Interestingly it doesn’t load the image of the dog for the preview. Still, it has it, it’s the right page, so I click “start experimenting”
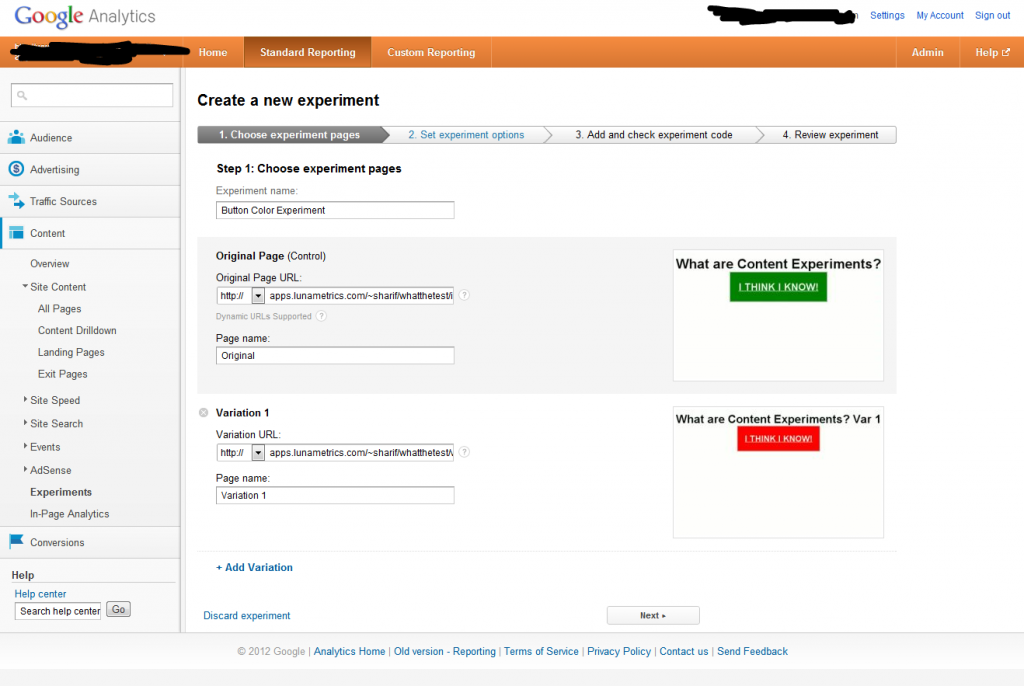
The next page I get to is to start choosing my variations. I name my experiment “Button Color Experiment” just for my own way of identifying it. No user sees that. Then I check the original page. Time to add a B to the A/B. I have created a second page, with a kitten image, and a red button. I add that URL to the variation 1 area and it loads up the preview. I could just go on from here, but I’m going to test a third option as well. You can test up to 6 variations at a time.
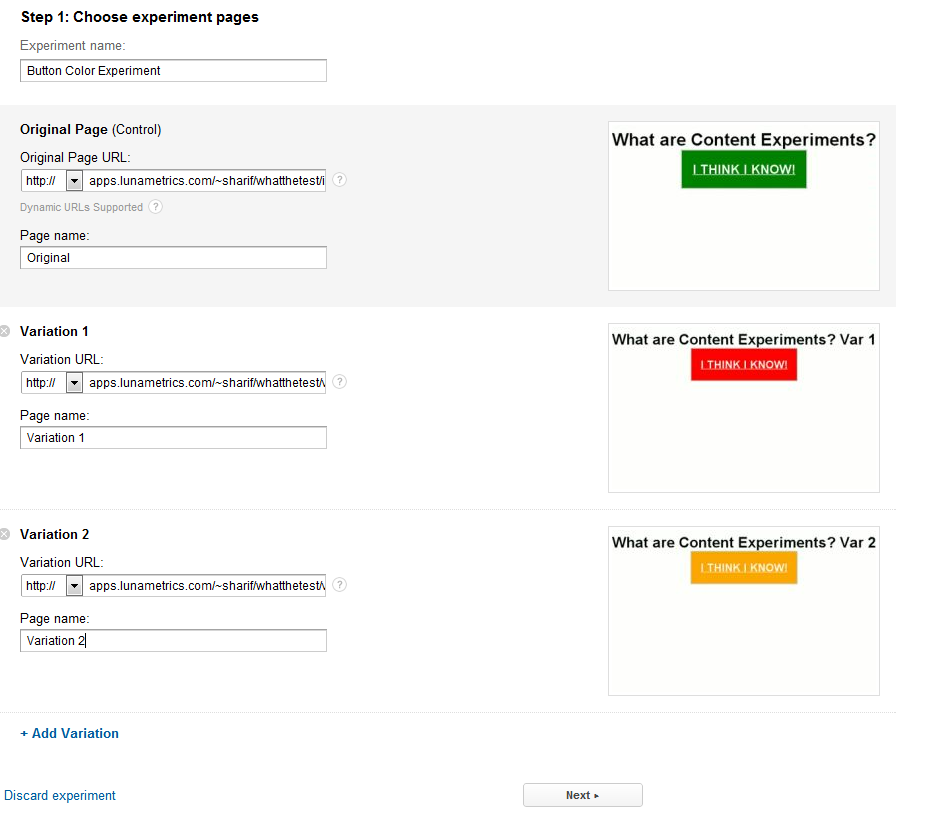
Now I have my three variations I want to test loaded in. green button with my original page, red button on my first variation, and an orange button on my second variation. Time to move to the next step.
Here’s where some people might get hung up. Right now you need to use a goal already in Google Analytics for your site. If you want to read up on goals we have plenty of blog articles on them. Right now you can do a URL Goal, or an Event. If you don’t currently have a goal set up for the page you want them to go to for a URL Goal for instance, you can click “add new goal” and go set it up right in the flow.
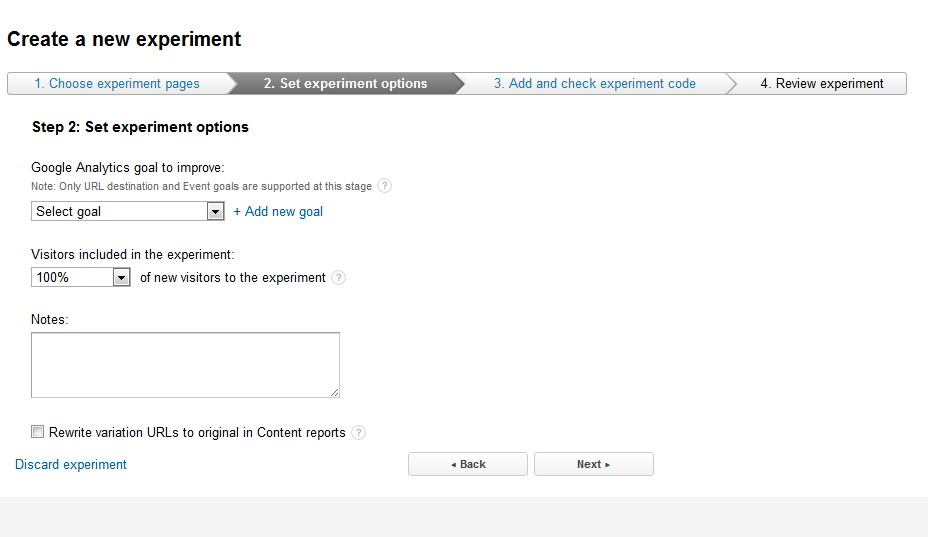
Clicking add a new goal, takes you right into your admin goal area. If you’re not an admin on your account remember you won’t be able to do this at all. So here you can create a new goal. I’m going to put it in set 2 to keep it separate from my other Goal Page.
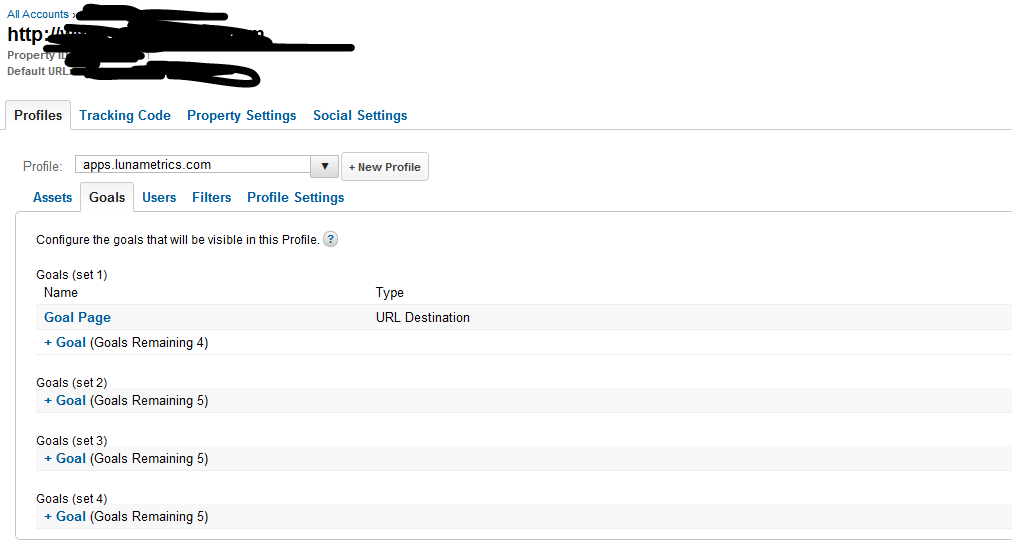
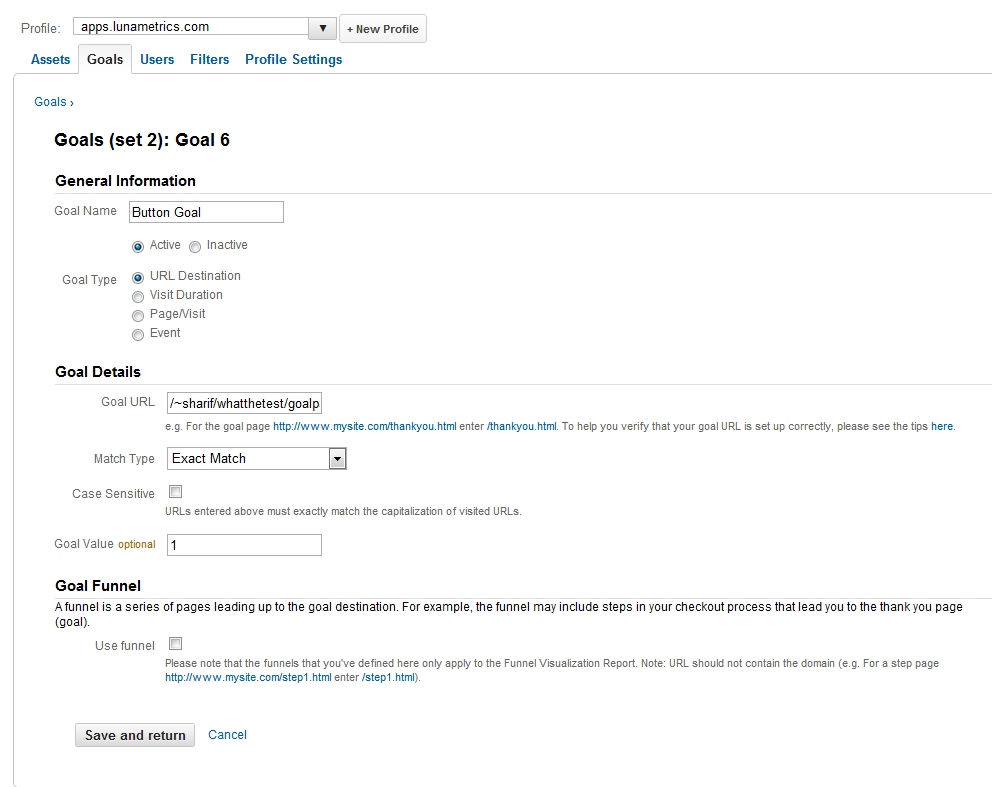
So I name it “Button Goal” and make it a URL Destination goal, and then in the Goal Details I put in the URL of the goal page that I want them to reach upon clicking that button. I gave it a goal value of 1. Why not. If you click save and return here, it’s pretty slick… It’ll take you back into your Experiment, so you don’t have to navigate back there or click the back button awkwardly.
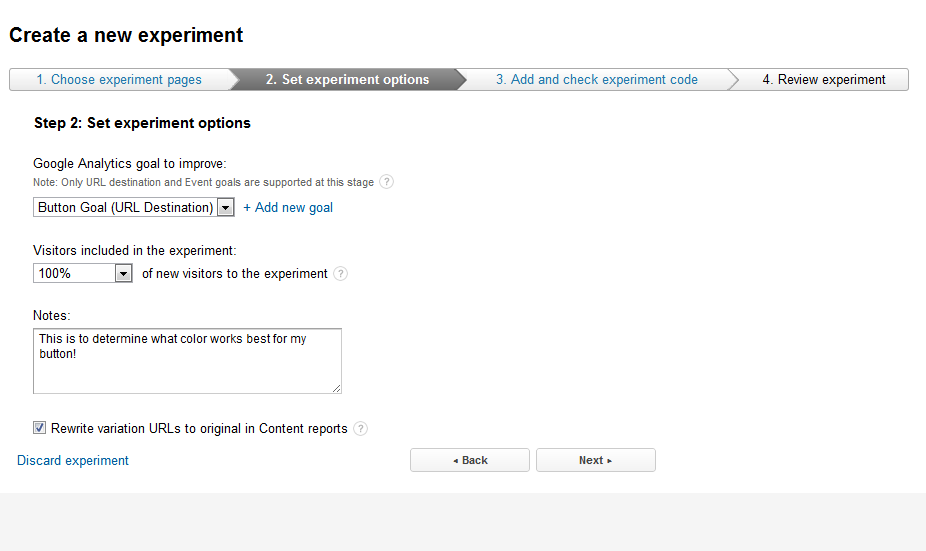
Once we’re back in the Experiment we can then select that new goal from the drop down list. We can also choose how many visitors to include. IF we get alot of visitors we could make that a much smaller number, and keep the testing to just a small segment of our user base. This is useful when you have enough visitors that not only you can get a good sample from a small percentage, but it keeps a massive amount of your user base from seeing these changes you’re testing, particularly when you don’t KNOW whether they’re good or bad. I’m leaving mine at 100% because I don’t really have any traffic to my lonely test page… You can also enter in notes, and then when you’re ready, click next.
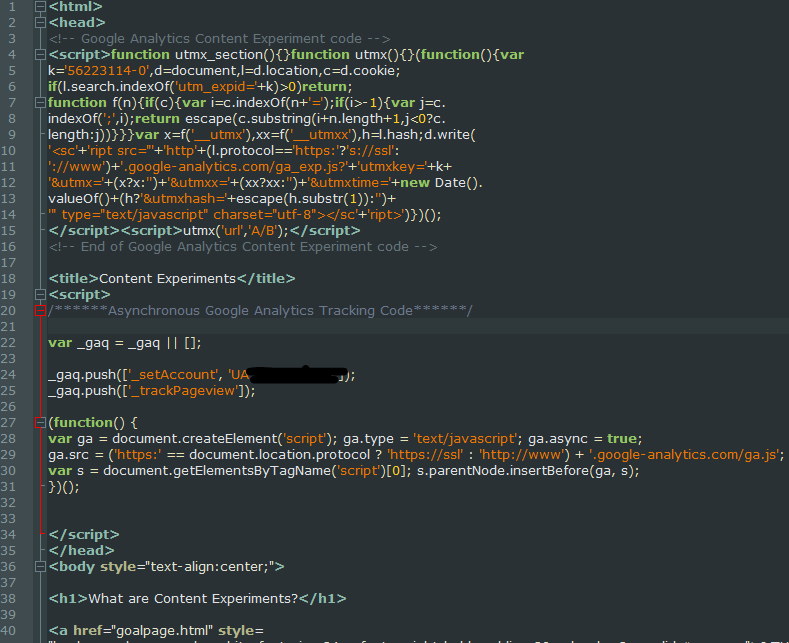
Now another stumbling block. You have to add some code to the first page of the test, the main page people go to. If you don’t have access to your website this is a problem, but you can email the instructions to people. However if you can modify it all you need to do is open up the HTML for the page you’re testing, and add this specific code right after the <head> tag.
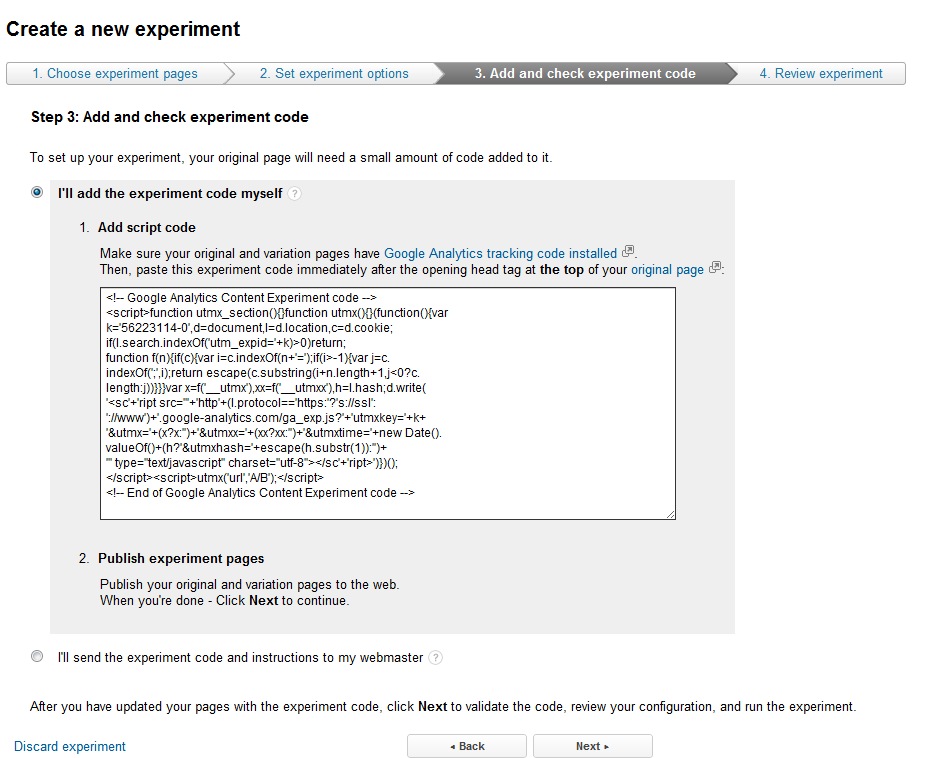
It’d look something like this…
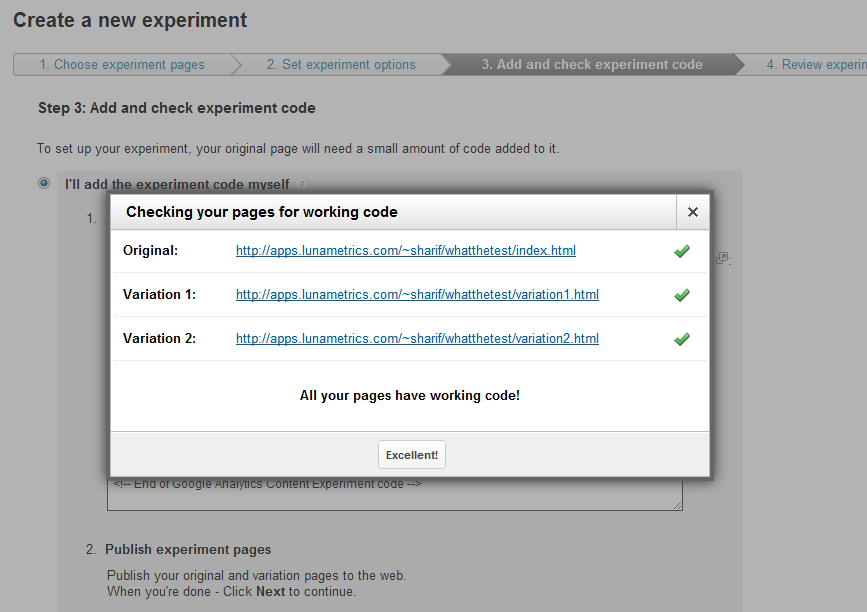
Once the code is in the page and on the server, click next to validate the pages. If the code is installed right and it can find all your pages you’ll get lots of green checkmarks and an “Excellent!” button. Click that.
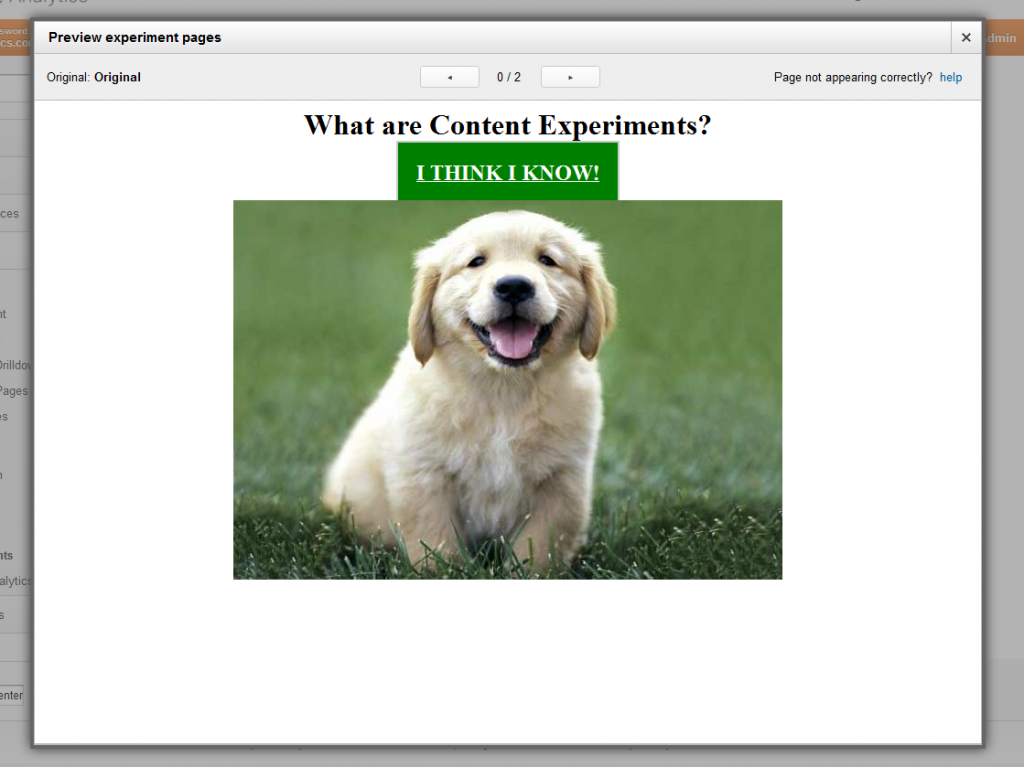
You’ll then be able to preview your experiment pages just to confirm it’s working correctly.


And from there you can confirm to run the experiment and you’re off to the races!

You’ll then be able to click on the experiment and view the page. Of course once you start the test there won’t be any data in it. It can take a bit for the data to populate, and it can take even longer for Google Analytics Content Experiments to determine a true winner. Days, weeks, even months depending on how much traffic you have.
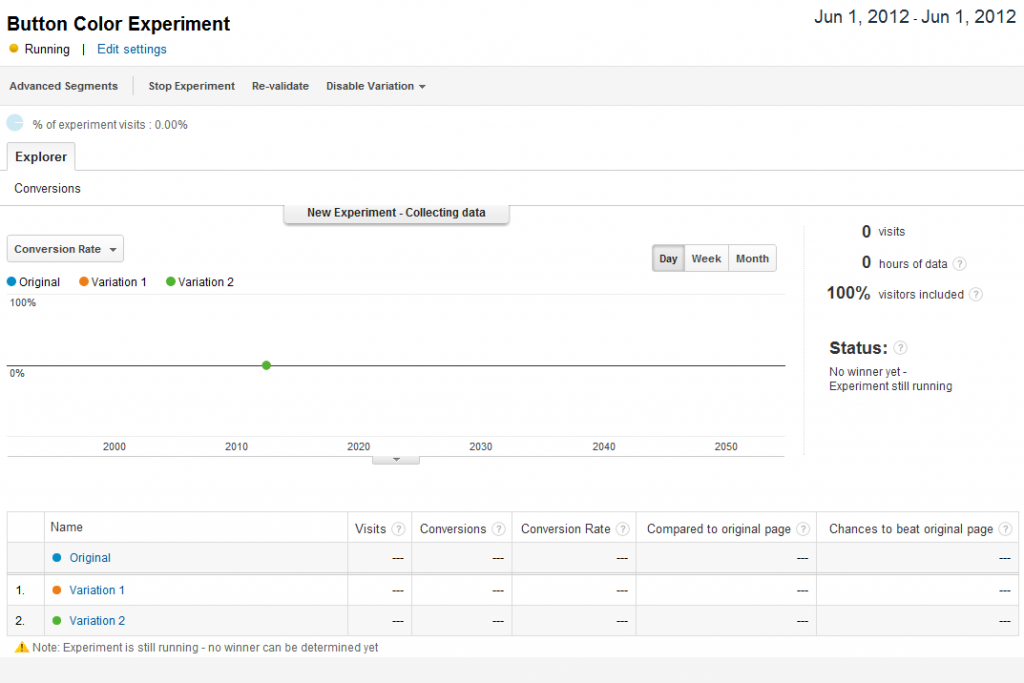
Also a note, you’ll be able to see the test is running by looking at the URL’s of those pages. There will be a new utm_expid parameter attached to the pages.

Once data starts to accumulate though you’ll start seeing the differences. You’ll be able to compare them to your analytics data, see them over time, and see the different conversion rates. And when one is determined statistically to be better than the rest, Google will let you know, and tell you which one is the winner!
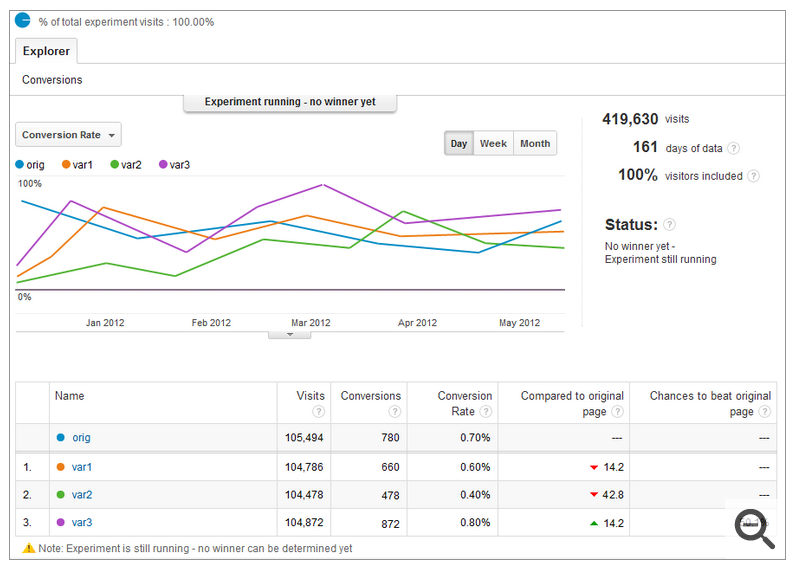
And then when a winner has been determined, it’s time to start a new A/B test with your winner and all new variations!
Conclusions
On the whole I”m pretty excited to have Content Experiments tied into Google Analytics. There are a number of benefits to the new system. There’s only one code snippet you need to include on the page rather than multiple pages of code. It really simplifies that aspect when you need to add new testing. You can also now use advanced segments to segment your results too.
There’s some improved statistical models too. Test results don’t even show up for 2 weeks or more, and all tests expire after 3 months, assuming you can’t get a statistically significant winner. If you have alot of traffic that’ll undoubtedly be true, but it’ll make it harder to do longer tests on lower traffic sites.
All in all though I think it’s great. If I had one wish it’d be to add Multivariate testing as well as just A/B testing. You can do MVT and pretend through an A/B test but it’s much more awkward.
So what are you waiting for? Go start testing something!


