Tracking Virtual Pageviews in Google Tag Manager

The pageview—one of the most important, or at least most commonly reported on, metrics in Google Analytics. Pageviews let you know how important a page is to your users. With pageviews, you can see unique pageviews, average time on page, entrances, bounce rate, and much more.
Pageviews are usually determined when the browser loads, or reloads a page. Sometimes, however, the configuration of our site (i.e.: ajax, or single-page applications) can limit what Google counts as a pageview, resulting in missed data collection opportunities. Anything that dynamically updates content on the page without actually pushing a refresh to the entire page has the potential to be missed in tracking.
Enter Virtual Pageviews: a data collection strategy within Google Analytics that enables you to send a pageview hit, even when the page doesn’t reload.
Why Use Virtual Pageviews?
If we’re working with a traditional website, many times pageviews get overlooked in favor of events during our complex and time-intensive Analytics implementations. We start down a path that involves extensively tagging interactions with the appropriate event category, action, and label using Google Tag Manager (GTM), or another data collection tool. When it's all said and done, we assume that all pageviews will be captured organically, and that our events will house everything that we need.
That’s not always the case, and there are other reasons why you might need a Virtual Pageview. Here are just a few of them.
Google Analytics Configuration Limitations
You head over to Google Analytics (GA) to configure your goals using events, you then realize that it would be “awesome-sauce” if you could see how people navigated through that really cool ajax form you just tagged, and if there were any resulting conversions. Sadly, funnel reports can only be created with page path data. What about all of the events we just labored over? Yeah, yeah, I know you could do it with Big Query, but let’s just say you don’t have time for that, right now.
Checkout Flows, or Multi-Step Processes
Like above, I usually find myself using Virtual Pageviews to capture navigation through a multipage form, sometimes in a modal popup. This is a great example because the URL sometimes won’t change as you progress through the steps. A form like this would normally have a button to trigger each step of the form, and we can use that to our advantage to create specific pageviews.
Single-Page Applications
When dealing with Single-Page Applications (SPA’s), Virtual Pageviews can be your bread and butter to see divisions in your data. Where all actions happen on home.html, and fragments (#) don’t find their way into Google Analytics, you could add the fragment to a Virtual Pageview so that it provides the insight you are looking for. For more information on tracking SPA’s, check out this blog.
These are instances where Virtual Pageviews can come to the rescue!
What the Heck Makes it “Virtual?”
Here’s the DL (down low, not dataLayer, you’ll find that in another blog post)…Virtual Pageviews are simply a data type that you dynamically send to GA, just like you would a custom event. With a Virtual Pageview, we are sending page hits to GA without requiring the page to reload. Sending Virtual Pageviews (page hits) instead of events (event categories, actions, and labels) opens us up to goal flow reports, conversions, and audience creation.
But wait a minute! That sounds hard to set up.
I promise you it’s less painful than sitting in Pittsburgh traffic to a Pens game. Let’s get started.
Sending Virtual Pageviews using Google Tag Manager
1. First, you will want to open GTM, and add a new Tag by clicking “Tags” in the left-hand menu.
2. Select the “New” button in the top right.
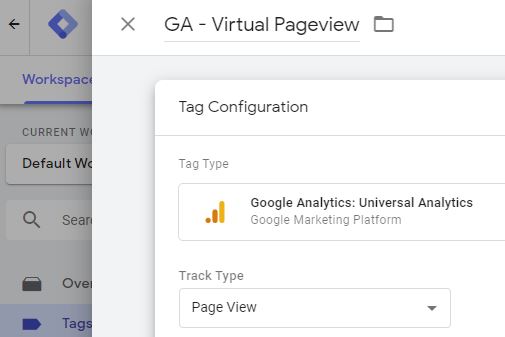
3. Give your tag a name by replacing “Untitled Tag” with something like “GA - Virtual Pageview.”
4. Click in the “Tag Configuration” area, and choose the “Google Analytics: Universal Analytics” tag type.
5. The track type of “Page View” is pre-selected for you, so that’s good. You can leave it as is.
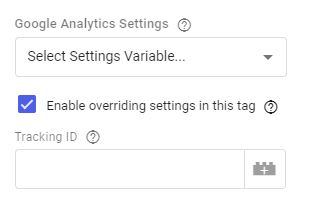
6. Select the checkbox for “Enable overriding settings in this tag.” This will open up more options below.
7. Select the “More Settings” accordion to open up even more of the settings we need.
7-a. Expand “Fields to Set” (by clicking the chevron icon), and then click the “Add Field” button.
7-b. Add “page” under field name. This will send your new “virtual” page location along to GA. This should be a path similar to “virtualpage/page”, “vpv/page”, where “page” is unique to this situation. You can make this anything you want, but it should be something similar so you know it is a Virtual Pageview at a glance.
7-c. Add another field for “title.” This can also be anything, but should be a unique page name so you can view it in reports later.
Ok, I Have a Tag, Now What?
Well, you’ll need a trigger to send that sweet, sweet Virtual Pageview to GA. If you are an avid user of GTM you should be familiar with adding triggers to your tag configurations. However, unlike, other “normal” pageviews using a singular, pre-built pageview trigger, this tag will often use other trigger styles.
Referencing our modal popup form example from earlier, the first step would be to inspect the HTML elements within your browser to determine any unique ID, attributes, or CSS selectors that can be utilized within our trigger. An example of the button would be this on-page code:
<a class="btn-orange" id="form_step1" href="/user/sign_up">Sign Up</a>Below I have set up a trigger using the trigger type of “Click – All Elements.” Most likely your button will use this or maybe the “Click - Just Links.”
In this example, we are using the Click ID of the button as “form_step_1”. This should round out your event, and when you go into preview mode and click your button, it should trigger the pageview.
Where Can We Find This Data in Google Analytics?
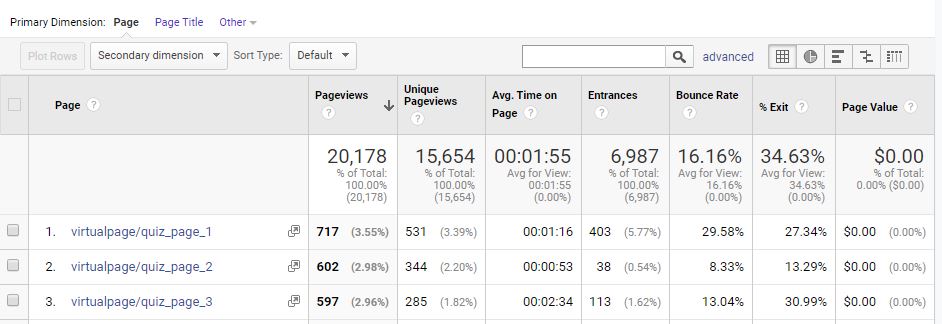
Lemme tell ya. By loading up GA, and navigating to your Behavior > Site Content > All Pages Report you can see all of your pageviews (virtual and non-virtual). You should then be able to filter your results for where the Page matches the URL of your virtual page, e.g.: virtualpage/quiz_page_1, or vpv/quiz_page_1.
Ok, I Found It, Now What?
Let’s put those hard-earned Virtual Pageviews to use! Goals, Conversions? Sure thing! One of the most common uses for Virtual Pageviews is to be able to enable the goal funnel report in Google Analytics, which will allow you to see who completed the funnel, and where drop-offs occur.
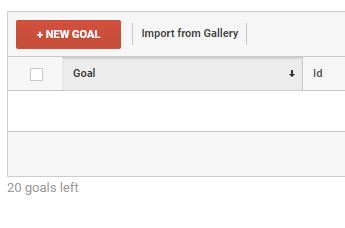
To get started, you’ll want to head over to Admin > Goals (under views), and make a new goal (hit the big red “+ NEW GOAL” button.)
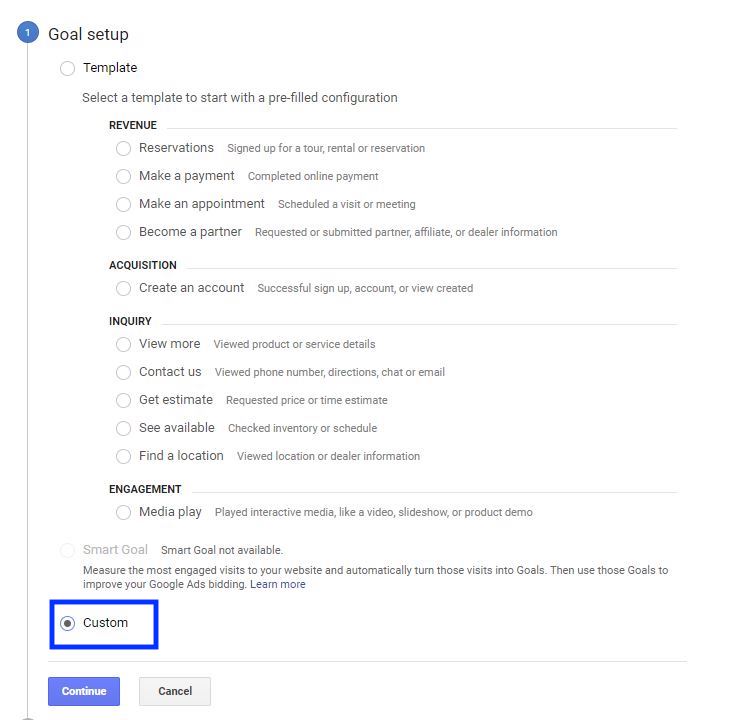
Step 1 of the goal setup is to choose “Custom” from the radio buttons, as this style is not one of their pre-formatted selections. Then select the “Continue” button.
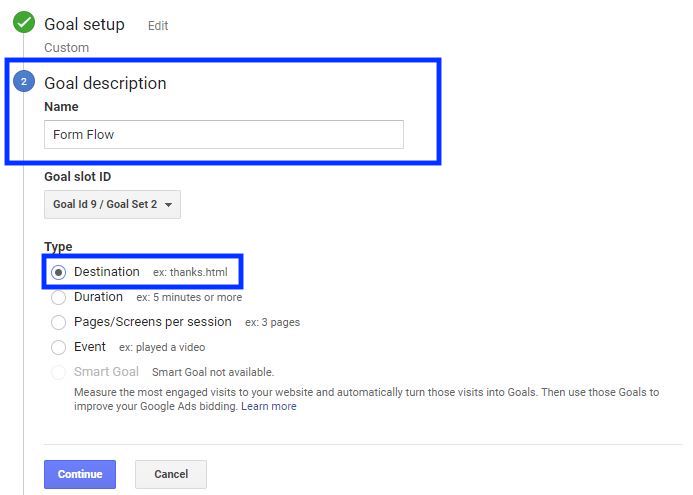
Part 2 of the goal setup is to give your new conversion an easy to remember name so that you can find it in your goals. The Goal Slot ID will default to the first unused goal ID. You can of course change this setting if a different Goal Set would match your reporting needs. Finally, select the radio button for “Destination.” This will give us the ability to create a funnel on the next step.
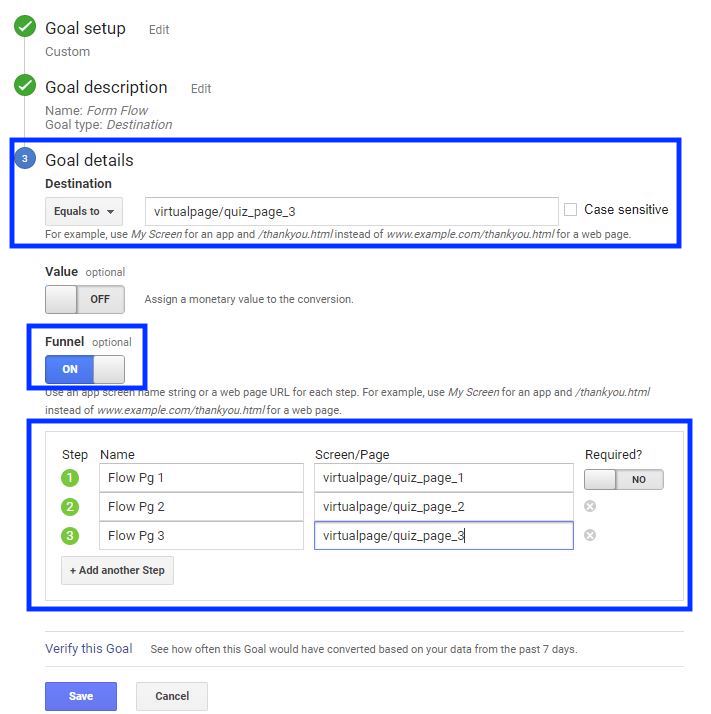
Because we selected “destination” on step 2, we now have the options we need to create a funnel.
First select the URL of your final destination…not like the movie, cause you know how that always works out. You can use “Equals to” if there is only one, or “Regex” here if you have more than one starting point. I use this site when creating my regex’s in case you want to try it out. The founder of LunaMetrics (which many of you remember as our company pre-Bounteous), Robbin Steif, also made a really good/fun reference doc here to download about Regex if you want to learn more.
Let's use “Equals to” because we know exactly where people end up when they convert. Flip the toggle for “Funnel” to turn on the funnel settings. This will allow you to set up the logic of the user flow. You can give the name any setting you want, but it should make sense to you in reporting.
Follow that with the URL of the “virtual” pages that you want to track. You can add a maximum of 20 steps. If the only way to enter the funnel is through the first step, you will want to toggle the “Required?” field to the right of step 1. This makes it so a conversion is only counted if users go to step 1 first. Once you have filled in all the proper steps, make sure to “Save” the form.
Your goal is now created.
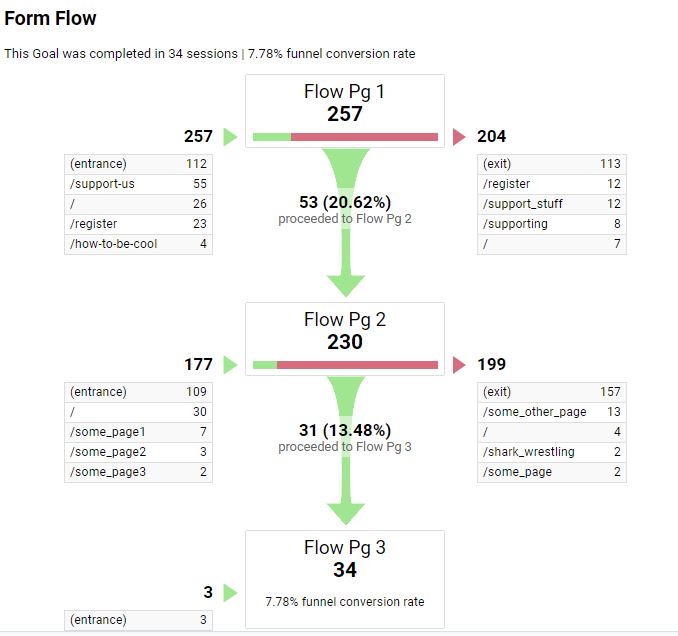
Test your flow following the setup above on the site to make sure things work as expected. Once the goal has been in place for a little while, and you have tested, you can go and check your reports to see how it worked out. The best place to see this is your “Funnel Visualization” report. It can be found under Conversions > Goals > Funnel Visualization.
Tracking Virtual Pageviews with Google Tag Manager
Tracking Virtual Pageviews with Google Tag Manager is really easy to implement, and fast to do. It can help you gain insight into places where users get stuck, or drop out. It can enhance your goals, conversions, and reporting in ways you only wish you could have before.
| Virtual Pageview Checklist |
|---|
| ⃞ Add a new page tag |
| ⃞ Choose Google Analytics: Universal Analytics |
| ⃞ Enable overriding settings checkbox |
| ⃞ Select More Settings |
| ⃞ Add page for field name, and a path |
| ⃞ Add title, and a custom title |
| ⃞ Give it a trigger |
| ⃞ Preview & Test |


