User‑ID: Measuring Real Users Instead Of Devices

When Universal Analytics was released by Google, it marked a fundamental shift in the way we analyze our data – by truly enabling us to focus on users instead of visits. A key aspect of this shift to a user-oriented perspective on data is the ability to track cross-device behavior for individuals. Real individuals – real unique users!
This is absolutely crucial for businesses today, where customers come across multiple touchpoints across a variety of channels and devices every day. For a number of reasons, the User-ID is a significant change to Analytics. It allows us to:
- Measure the amount of users to our digital properties with far greater accuracy.
- Unlock greater insights with user-specific reports that are otherwise unavailable in standard reports.
- Segment prospective customers from current customers more effectively.
- More accurately attribute value to key conversion channels by improving upon conversion paths.
Background
When a person loads a page on your website, Google Analytics automatically assigns that person a Client ID, which is unique to the specific browser and device and stored in cookies. A single person may be assigned many Client IDs, such as if they visit your website from their mobile phone and then later return on their desktop computer. Each unique Client ID that is sent to Google Analytics is reported as an individual User.
If you have some way of identifying an individual person, whether through a login feature on your website or some customized promotions, you likely already have an internal way to refer to them. We refer to this as a User-ID, which is simply a unique string of characters assigned to one individual so that they can be recognized as a single user. Regardless of the number of devices they use to visit your website or mobile application, as long as they log in or identify themselves as an individual, we can pass that information to GA via the User-ID field. By setting the User-ID, you can create a View that essentially overrides the functionality of the Client ID, in favor of the User-ID in order to tie each of those touchpoints to a single user.
How to Implement
So now that we have a little background, let’s review the steps to actually implement the User-ID override feature for Google Analytics, in Google Tag Manager of course!
Step 1: Identify your visitors with unique User-IDs
You will need to either generate unique IDs for your users or pull them from an existing resource, such as a customer database/CRM or cookie. Consider your options – if your website has user login functionality, that is a great place to start.
For example, many ecommerce websites offer users the ability to create an account where their preferences, personal information and purchase history can be saved. Publisher sites often offer memberships for premium content. Educational institutions have student portals for coursework and tuition-related information.
Each of these is a great example of incentivized self-identification, where users gain some sort of value for logging in. This is the optimal environment for setting up the User-ID – without this type of functionality, configuring the User-ID is going to be much more difficult to do.
There are other opportunities, however, if you want to get even more creative. Campaigns could also be used to define users. For example, if you have an email list (which also contains a unique ID per user on your email list) you could send out an email promotion which contains a dynamically generated link back to your website. That link would contain a unique ID for each subscriber, which would be collected once the user clicks on the link and comes to your website.
For the ambitious, and to really use all of the features that Universal Analytics offers, loyalty cards can be tied to a unique identifier per user – and purchases made with loyalty cards can be sent to Google Analytics via the Measurement Protocol or Data Import.
Step 2: Configure GTM to Collect the User-ID and Assign It To Users.
Your website is ready to go, now let’s send that information to Google Analytics! Start by creating a variable in GTM for the User-ID value so that GTM knows where to look for the IDs.
Best case scenario would be to pass the information programmatically to the data layer, and then grab that inside of GTM with a Data Layer Variable.
–
Your data layer may look like the following once a user logs in:
var dataLayer = window.dataLayer = window.dataLayer || [];
dataLayer.push({
   'userID' : 'user132156'
});
//GTM SNIPPET
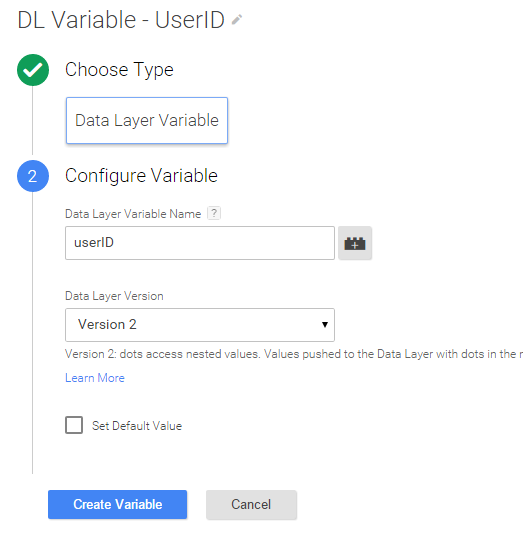
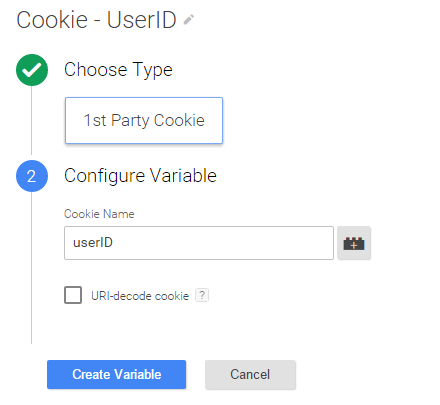
Another alternative would to be grab the ID out of a cookie that you already have on your site. You can set up a First Party Cookie variable with the name of the cookie you will be getting the IDs from:
User-ID is passed to Google Analytics attached to a hit, like a pageview or event. Most commonly, we’ll just use the general pageview tag that is already firing on every page. Click into your existing Google Analytics tag and choose Configure Tag to edit the existing settings. Under More Settings > Fields to Set, add a new field and name it “userId.” As you start typing in user, GTM will default to the correct spelling for you (which looks a little different than the JS version.) For the value, fill in the variable that you created earlier.

According to the Google Developer Guide, there is no maximum length for the User-ID value.
You can also set a custom dimension containing the User-ID if you wish. This will allow you to segment your data in your non-User-ID-specific Views and see a larger picture of your data. Just remember not to pass in a User-ID that may contain personally identifiable information, like a person’s name.
Step 3: Configure the User-ID settings in Google Analytics
After you have your User-ID ready to send to Google, now you need to make sure GA is set up properly. Inside of Google Analytics, you need to read and agree to the User-ID policy and then enable the feature in the Admin settings at the Property level, under Tracking Info > User-ID.
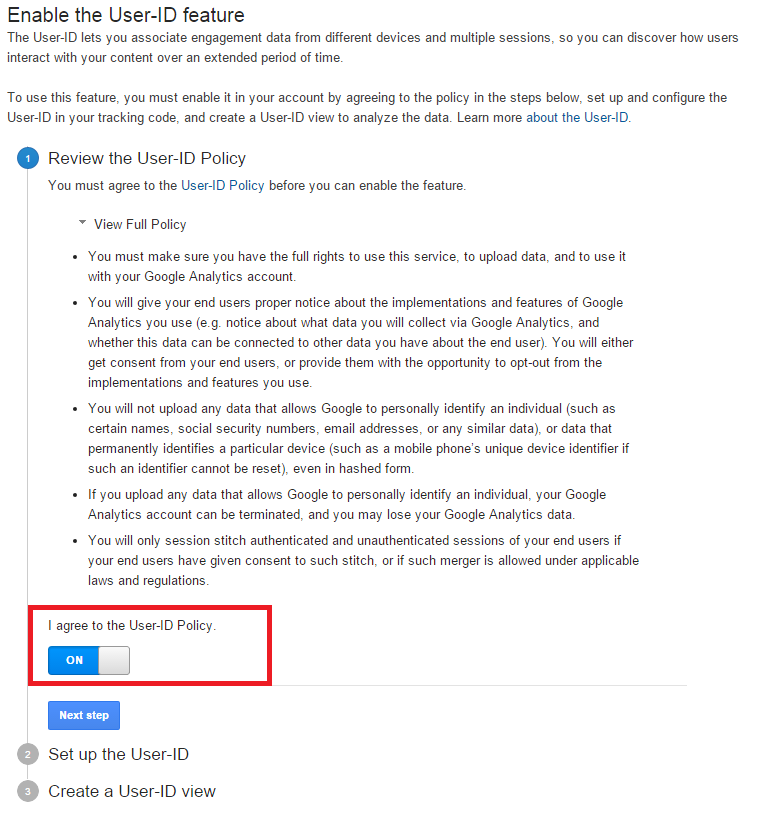
Note: This may require an update to your privacy policy.
Sessionization
Of course, users need to log in before you can assign them an ID, and not all of your users will log in each and every time they visit your website – so it may take a little time to actually assign a decent amount of User-IDs. It is also important to keep in mind that users who have logged into your website in the past will not automatically have an ID assigned to them.
Often a user will browse your website for a period of time, before they decide to login. It is possible to group these hits set prior to when the User-ID was assigned, but only those collected during the same session during which the ID is assigned for a given user. To do this, you must enable the session unification feature in the Admin settings when you configure the User-ID.
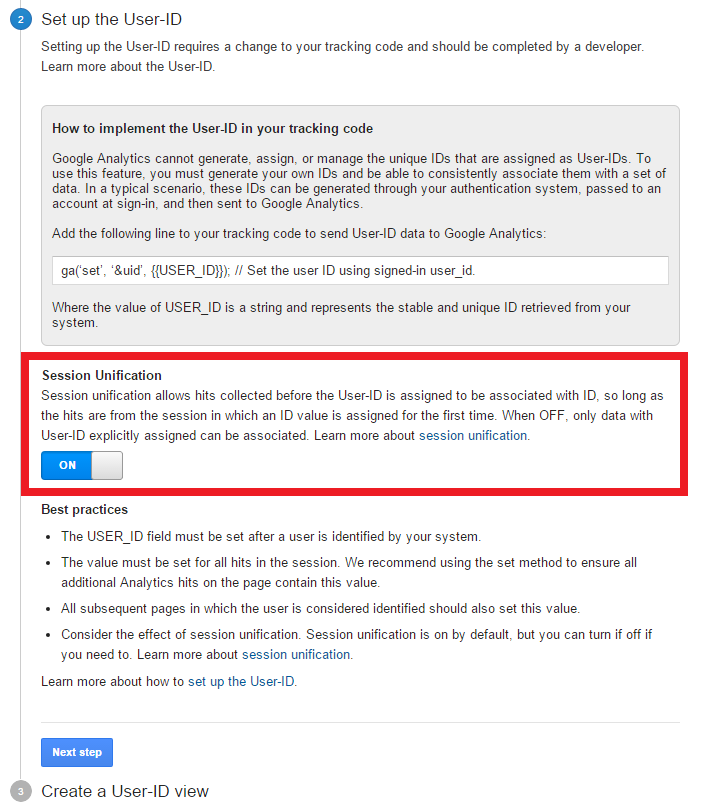
For more details about session unification, take a look at the Google Analytics Help files.
In addition to that, I also recommend that you check out Simo Ahava’s article about persisting the User-ID in a cookie so that each time users return to your website and do not log in you can still recognize their User-IDs.
Step 4: Configure a User-ID View
You will also need to configure a specific View that will include only hits that were made by users who were assigned a User-ID. In this View, each of your standard reports will be based off the User-IDs rather than the Client IDs. Granted, you will not have as much data in this new View as you do in your standard Views, but you gain a new perspective on individual users and their behavior.
Multi-Channel Funnel reports and Acquisition reports may be more accurate as they reflect upon users rather than cookies, for example. Frequency and recency of returning users may also be more accurate.
In addition, you also receive new reports that are only available in User-ID-specific Views. These reports help paint a more realistic picture of the number of devices used to access your website, which devices purchases are made on most frequently, and more.
The new reports listed below can be found under “Cross Device” within the Audience section of Google Analytics:
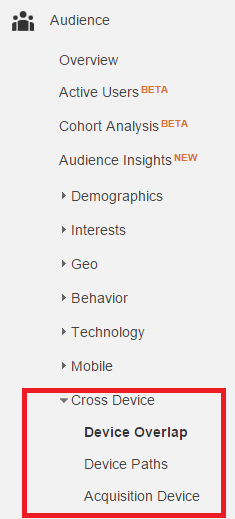
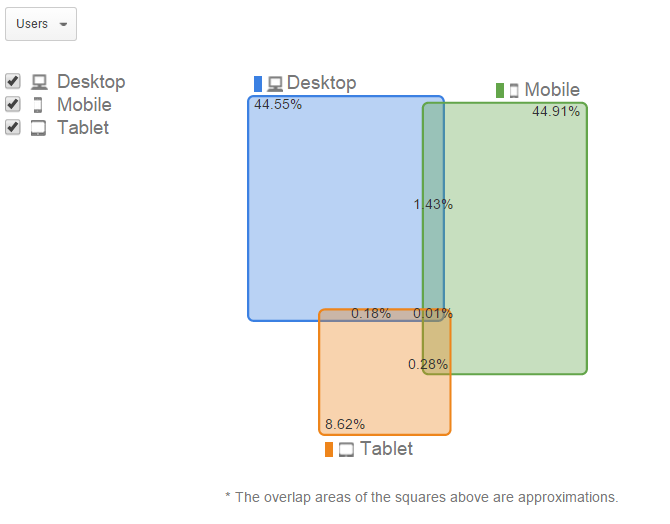
Device Overlap
The Device Overlap report shows which devices users are visiting your website from, including the “overlap” or those who visit your website from a combination of devices.
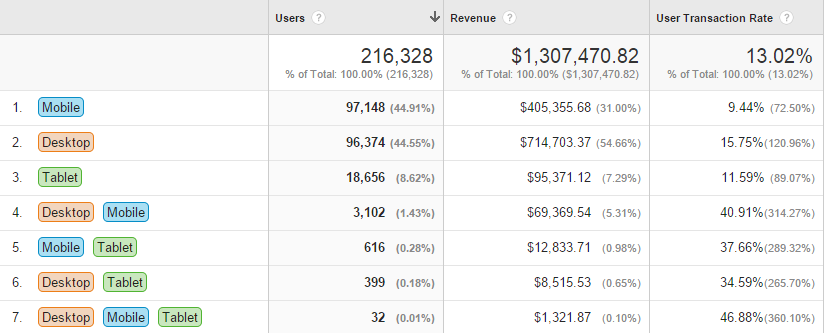
Beneath that is a break down of the revenue and transaction rate for each combination:
Device Paths
The Device Paths report enables you to see what sequence users are accessing your website from various devices. It also directly ties to revenue and transactions:
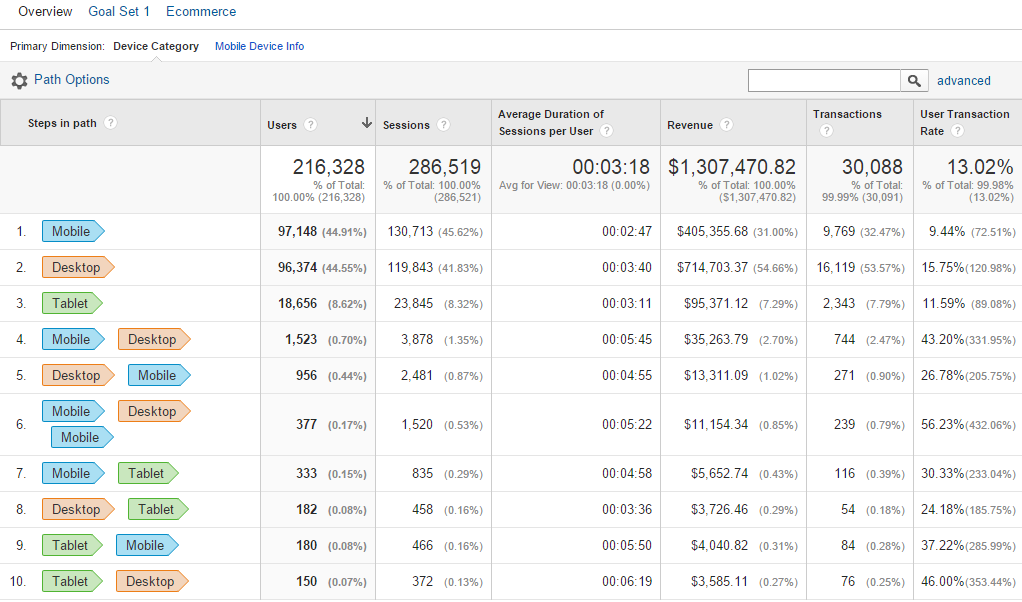
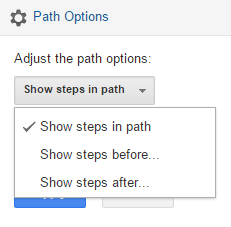
You’ll also notice “Path Options” at the top of that report. These options allow you to specify that you want to see the steps that occurred before or after a particular event occurred, such as any goal completion, any transaction, a specific event, pageview, etc. You can also toggle the columns of the report to show data specific to goals or ecommerce by changing your selection from the top of the report.
Acquisition Devices
This report shows which devices users originally used to access your website (from the time that the User-ID was set for them). You can see revenue from each device in comparison to revenue from each originating device:

Now that User-ID is set up, you’ll hopefully be able to unlock insights by tying various devices and sessions to individual users.