How To Import A Container Into Google Tag Manager

Today we’re highlighting one of Google Tag Manager’s less talked about features – importing a container, which we mentioned in last year’s post about Google Tag Manager’s new look. This tool helps us manage multiple containers, make bulk changes, and import specific tags, triggers, and variables created by others. We’ve broken down the process into simple steps below!
What Is Container Import?
This is a feature in Google Tag Manager that let’s you import a JSON file that contains tags, triggers, and variables into your container. This may be an entire container or just items.
Why Would You Need To Import A Container?
Four common use cases for importing a container are:
- You have a lot of sites and want to set up a default container for each of them. For example, imagine a hotel chain that has 100 hotels, each with its own site and container. Would you rather go in and manually create dozens of tags, variables, and triggers from scratch 100 times, or just do that once and import those settings 99 times?
- Importing new tags, variables, and triggers that have been shared with you.
- Making bulk changes to your container.
- You’re maintaining separate GTM containers in different environments, like a dev or staging site, and you want to export out of one environment and into another.
How To Import A Container
Follow the simple steps below to import a container:
1. Log into GTM and navigate to your Account and container.
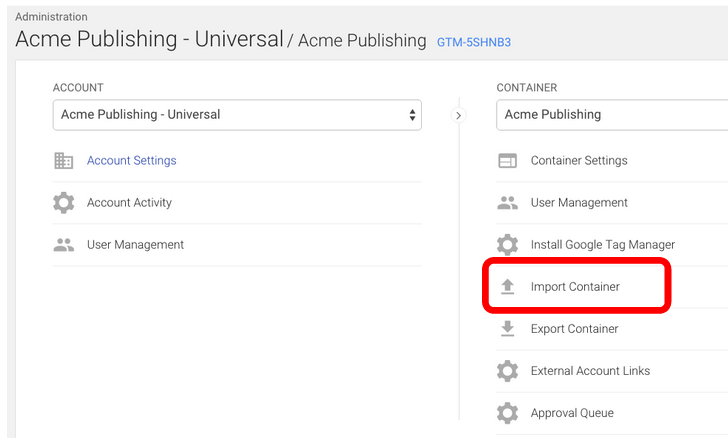
2. In the top navigation, click through to the Admin

3. Under the Container options, click on Import Container

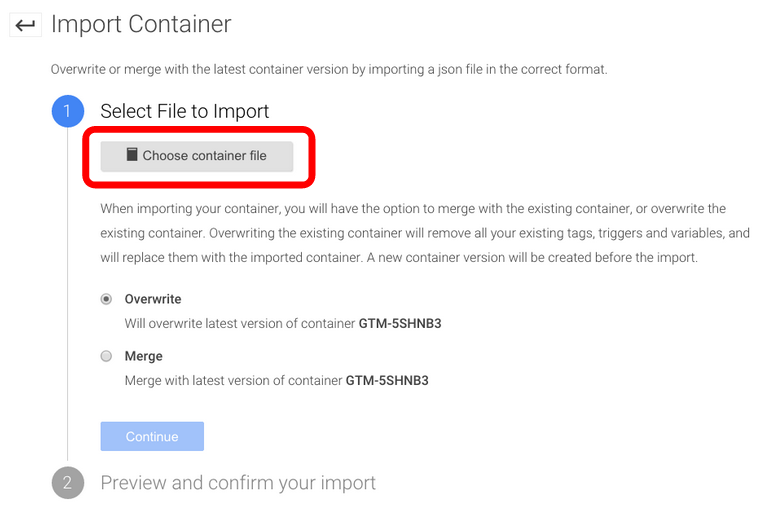
4. Choose the JSON file that has the container you wish to import. See below for details about how/where to get this file.

5. Choose to either Overwrite or Merge.
- Overwriting the existing container will remove all your existing tags, triggers, and variables, and will replace them with those in the imported container. A new container version will be created before the import. Use this option if you want to start fresh with the imported container.
- Merging containers will let you keep your existing tags, triggers, and variables, and just add in the new ones. If you choose to Merge the new container with your existing container, you’ll have to then decide whether you want to overwrite conflicting tags, or rename conflicting tags.
- Overwrite – If a variable, tag, or trigger in the new container has the same name but the contents are different, overwrite the old one with the new one.
- Rename – If a variable, tag, or trigger in the new container has the same name but the contents are different, keep the old one and rename the new one.
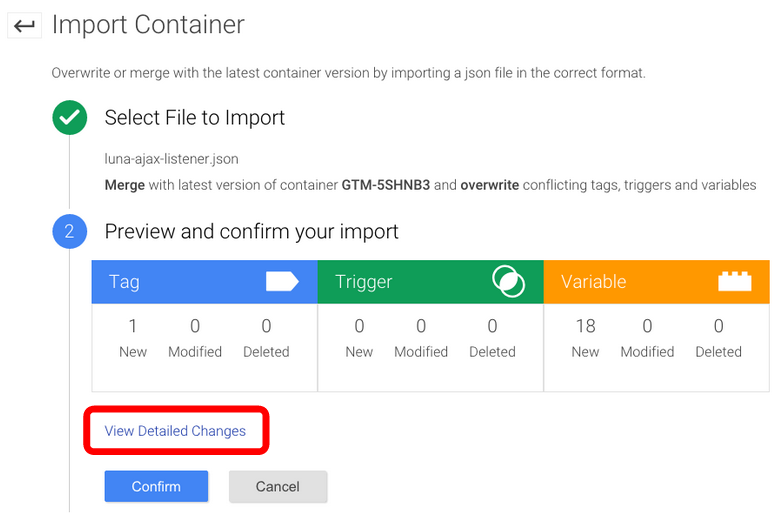
6. Click Continue. You’ll see a preview of changes, showing how many tags, triggers, and variables will be added, modified, or deleted. You can also click the link to View Detailed Changes to see which tags, triggers, and variables are being added, modified, or deleted.

7. Once you’re satisfied with the changes, click Confirm.
What If I Don’t See The Import Container Option?
You need to have edit permissions for the container to be able to import. If you don’t have edit permissions, you won’t see this option.
Where Do I Get A Container File?
There are generally two ways to get a container file to import:
- Export a container from your GTM account. In the Admin, just beneath the Import Container option, there is also an Export Container option. Clicking on Export Container will let you select a container version, and then it will generate the JSON file needed to import into another container.
- Other shared resources. At Bounteous, we will start sharing container files for things like YouTube video tracking, AJAX event listening, and more. Check our blog regularly for these resources!


