Extending Google Analytics With Programmatic Data Import
There are lots of external data sources with juicy information you might like to see modeled in Google Analytics. Maybe you’ve got cost data from non-Google ad networks you’d like to see accounted for in your reports. Maybe you have data from a CRM that you want to use to enhance your Google Analytics reporting. For these and many other cases, Data Import is your huckleberry.
My colleague Jim Gianoglio wrote a great post detailing how to use Data Import via the web interface, where you can quickly and easily upload a CSV of custom data for Google Analytics to use.
Published: September 28, 2015
But what about when you’ve got data that updates frequently? Can we automate that process?
The answer is yes; we can do programmatic Data Import with Google Analytics. Today we’ll look at two examples – Salesforce lead information and Facebook Ads Cost Data.
Step 0: Prep Work
In order to bring in our data to Google Analytics, we have to be able to join the data in Google Analytics with a shared key. If you’re not familiar with this concept, think of a coat check – you hand in your coat and get a ticket. The coat check employee puts a matching ticket on your coat and hangs it.
Later, you can exchange your ticket for the same jacket. Your ticket is the key – both the coat and the owner have the same number. This allows the coat check employee to not have to remember all the names and faces of jacket owners, and the jacket owners to not have to recite all the details about their coat when they try and claim it.

For our Facebook data, we’ll be using our Campaign Source and Medium as our coat check ticket – on all of our Facebook ad destination URLs, we’ll add campaign parameters like this:
http://oursite.com/ads/facebook-ad-landing-page?utm_source=facebook&utm_medium=cpc&utm_campaign=facebook-ads&utm_content=banana+smoothie+post
For our Salesforce data, we’ll be using our Google Analytics Client ID. We’ll have to have stored the Client ID in Salesforce, too. I’d recommend utilizing a hidden field on all Salesforce forms to capture Client IDs, discussed in the blog below. You’ll also need to have created a Custom Dimension in Google Analytics and stored Client IDs there, too.
Published: February 1, 2016
Editor’s Note: This post will walk through the programmatic data import process for Google Analytics, but won’t go into the specifics required to create your data sets, set up automated scripts, and handle authorization.
We’re assuming you’re technically savvy enough to gain authorized access to Google Analytics, Salesforce, and Facebook (or your data source of choice). For more on how to access your Salesforce data, check out their documentation on their web server OAuth flow. You’ll find Facebook’s docs on authorization here.
Fair warning: all of these authorization schemes are relatively tool-specific and confusing. For Salesforce, make sure your App Client has the refresh permission configured, and for Facebook, you’ll need to get the ads_read permission from a user managing those ads and trade up for a long-lived token. And for Google Analytics, you’ll want to follow the service-type authorization flow. Hopefully those tips save you some time!
One more note before we jump in – we’re going to assume that you’ve got a server somewhere that you can use to host a service that handles the orchestration of everything we’ll discuss below. If you’re looking for something on the cheap and don’t anticipate high volumes of data, I’d suggest checking out Google App Scripts. They’re a great fit for this situation; you can set up triggers and make HTTP calls to external services. Just be aware that your scripts will die if they go over the six minute execution limit.
Step 1: Creating Our Data Sets
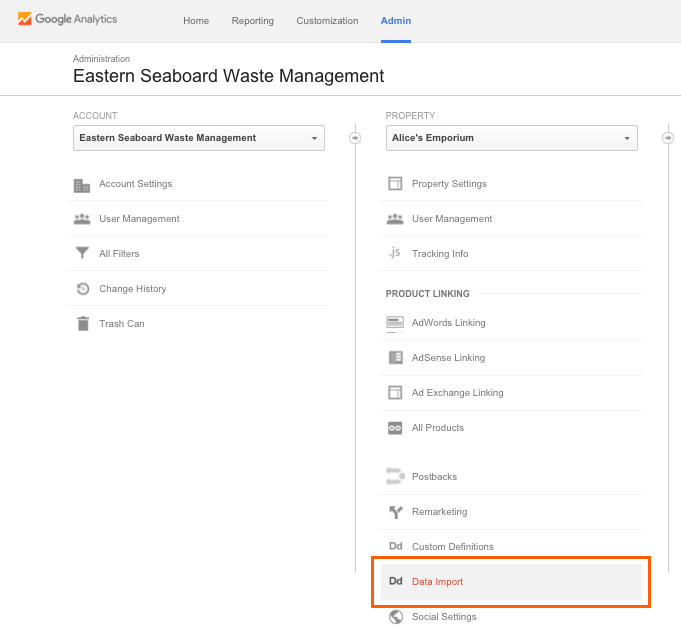
In order to send data into Google Analytics, we’ll need to create a Data Import Data Set. We can create and configure our Data Sets from within the Data Import configuration interface, which you can find under the Property column in our Admin Tab:
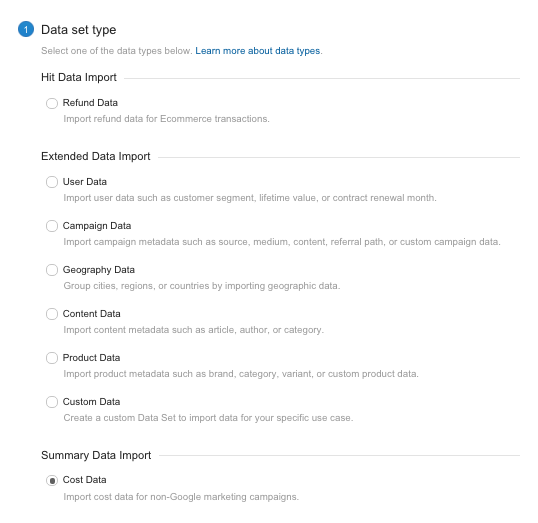
Inside the Data Import interface, click New Data Set.
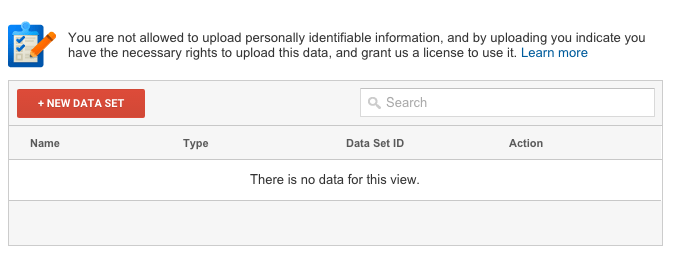
Then, we’ll select the Cost Data data set type and click Next Step.
We’ll give our data set a name, and select which views we would like the data set to bring data into.
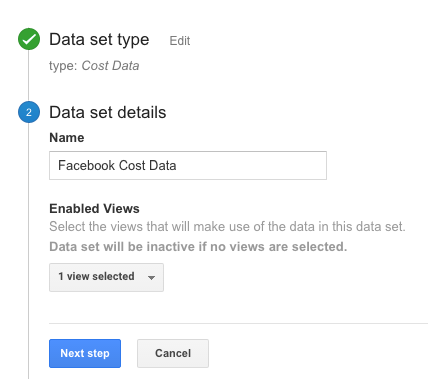
Finally, we will configure the schema for our data set. Depending on what data we have available, we might use more or fewer dimensions and metrics. Then we’ll be ready to save our data set.
Once we’ve saved our data set, we’ll need to do two things:
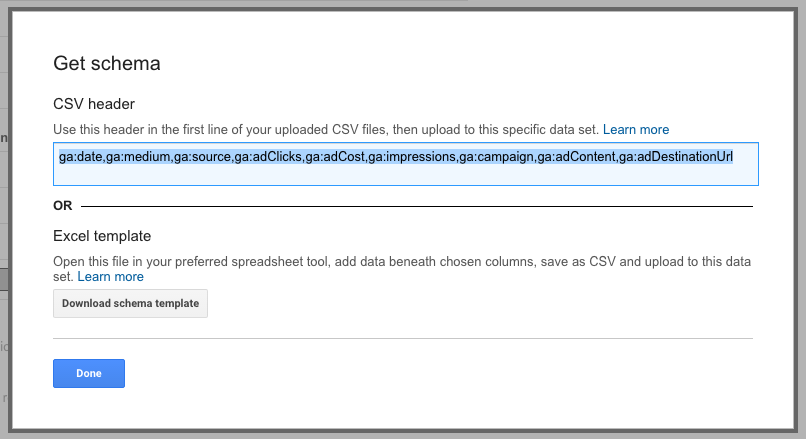
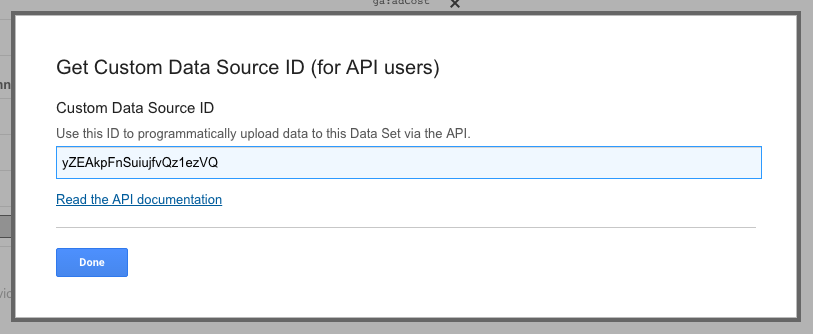
- Click Get Schema and copy down what we see
- Click Get Custom Data Source ID and copy down the ID of our data set
Setting up Our Facebook Cost Data
I’m going to add the Campaign, Ad Content, and Destination URL dimensions. I’ll also add the Impressions, Cost, and Clicks metrics. Finally, I’ll select Overwrite for my cost data import behavior. This means that if I upload two sets of data with duplicate keys, Google Analytics will overwrite the values from the first set of data with the values from the second set. You may prefer the other option, Summation, which will sum up the values of duplicate keys instead. Then we’ll click Save.
And that’s it! Our Facebook Cost Data data set is ready to go. Make sure you copy down the schema and data source ID, as outlined above.
Setting up Our Salesforce Data Set
For our Salesforce data set, we’re going to first need to create a Custom Dimension named Salesforce ID. Which ID you use (Opportunity, Lead, Contact, etc.) is up to you – you’ll have to ask yourself how you want to model your data in Google Analytics. For our example, I’ll be using the Lead ID.
Make sure you’ve got your Client ID dimension set up too, as outlined in Step 0. If you want to include any other data from Salesforce, e.g. Department Contacted, you’ll need to create additional Custom Dimensions for that data. We’re going to keep it simple for today.
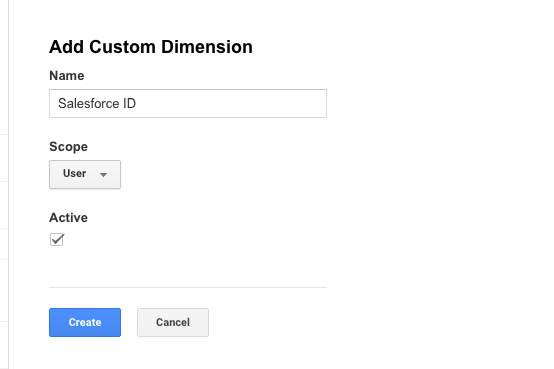
Once you’ve got that in place, head over to our Data Import interface and create a new Data Set. You might be tempted to pick User Data, but that relies on the User ID dimension as our joining key, which we may or may not have. We want to use our Client ID as our joining key, a Custom Dimension, so we’ll select Custom Data.
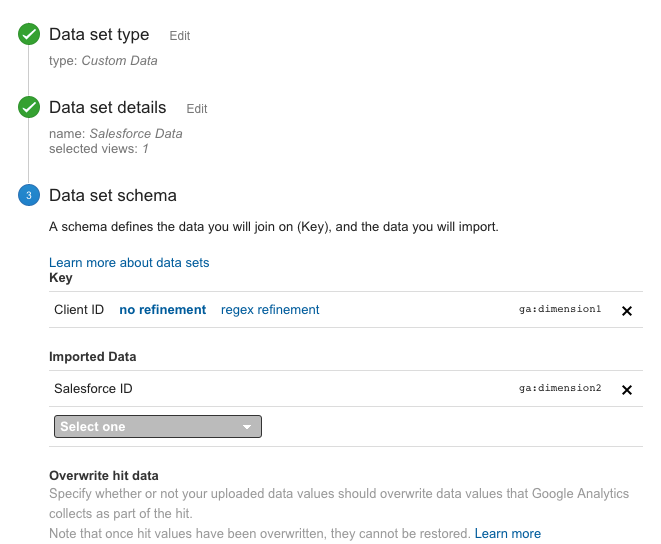
Next, we’ll select Client ID as our Key, which we’ll find nested under Custom Dimensions in the dropdown. Then, we’ll select Salesforce ID as our Imported Data.
At the end of the creation wizard, we have the option to select whether we’d like to overwrite dimension values if a hit contains values for the same dimensions. If you’re planning on sending in this data along with hits from another source and you have reason to believe the value might change, you might select No, and defer to the value with your hit. If you believe your automatic upload will always contain the most correct data, you can select ‘Yes’. We’ll go with Yes, because we don’t expect our Salesforce ID to ever show up on a hit and if it did, it would be better to defer to our uploaded data. You should end up with something like this:
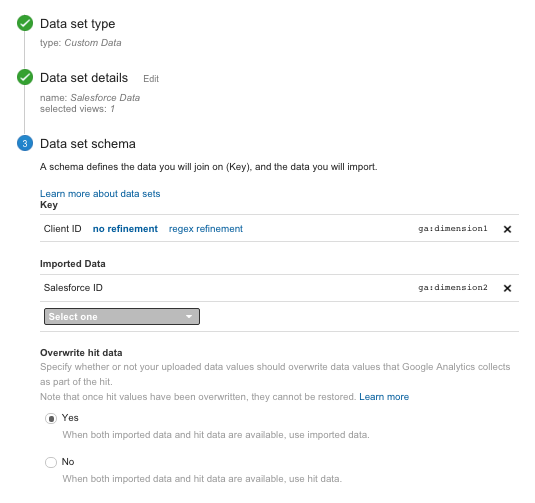
Save the data set, copy down the Data Source ID and schema, and we’re ready to start sending in data!
Importing the Data
Now that our data sets are in order, it’s time to begin uploading the data to Google Analytics. Remember the schema that Google Analytics provided us for a data sets? E.g., our Facebook Cost data set has this schema:
ga:date,ga:medium,ga:source,ga:adClicks,ga:adCost,ga:impressions,ga:campaign,ga:adContent,ga:adDestinationUrl
Once we have the data, we’ll need to format it to follow the schema provided by Google and then stuff it into a CSV file. Ultimately, the file should look something like this:
ga:date,ga:medium,ga:source,ga:adClicks,ga:adCost,ga:impressions,ga:campaign,ga:adContent,ga:adDestinationUrl
20160101,cpc,facebook,10,13.12,1001,Dan's Awesome Campaign,Dan's Even Better Ad Name,http://www.bounteous.com?utm_source=facebook&utm_medium...
...
Or for our Salesforce data set:
ga:dimension1,ga:dimension2
350989407.1454899563,00Q310000173c4m
To upload the data to Google Analytics, simply POST your CSV to:
https://www.googleapis.com/upload/analytics/v3/management/accounts/accountId/webproperties/webPropertyId/customDataSources/customDataSourceId/uploads
Use the MIME Type customDataSourceId is our Data Source ID from earlier. Once we’ve posted our data, Google Analytics will return an uploads resource with data specific to your freshly uploaded data set, or any errors that occurred.
A few quick notes on limits – in addition to the normal Google API restrictions, you’re only able to create 50 data sets per property, and upload 50 CSVs of data per day, of a max of 1GB in size. You’re also limited to importing 100MB of data per ga:date value in Cost Data imports.
Using The Data in Reports
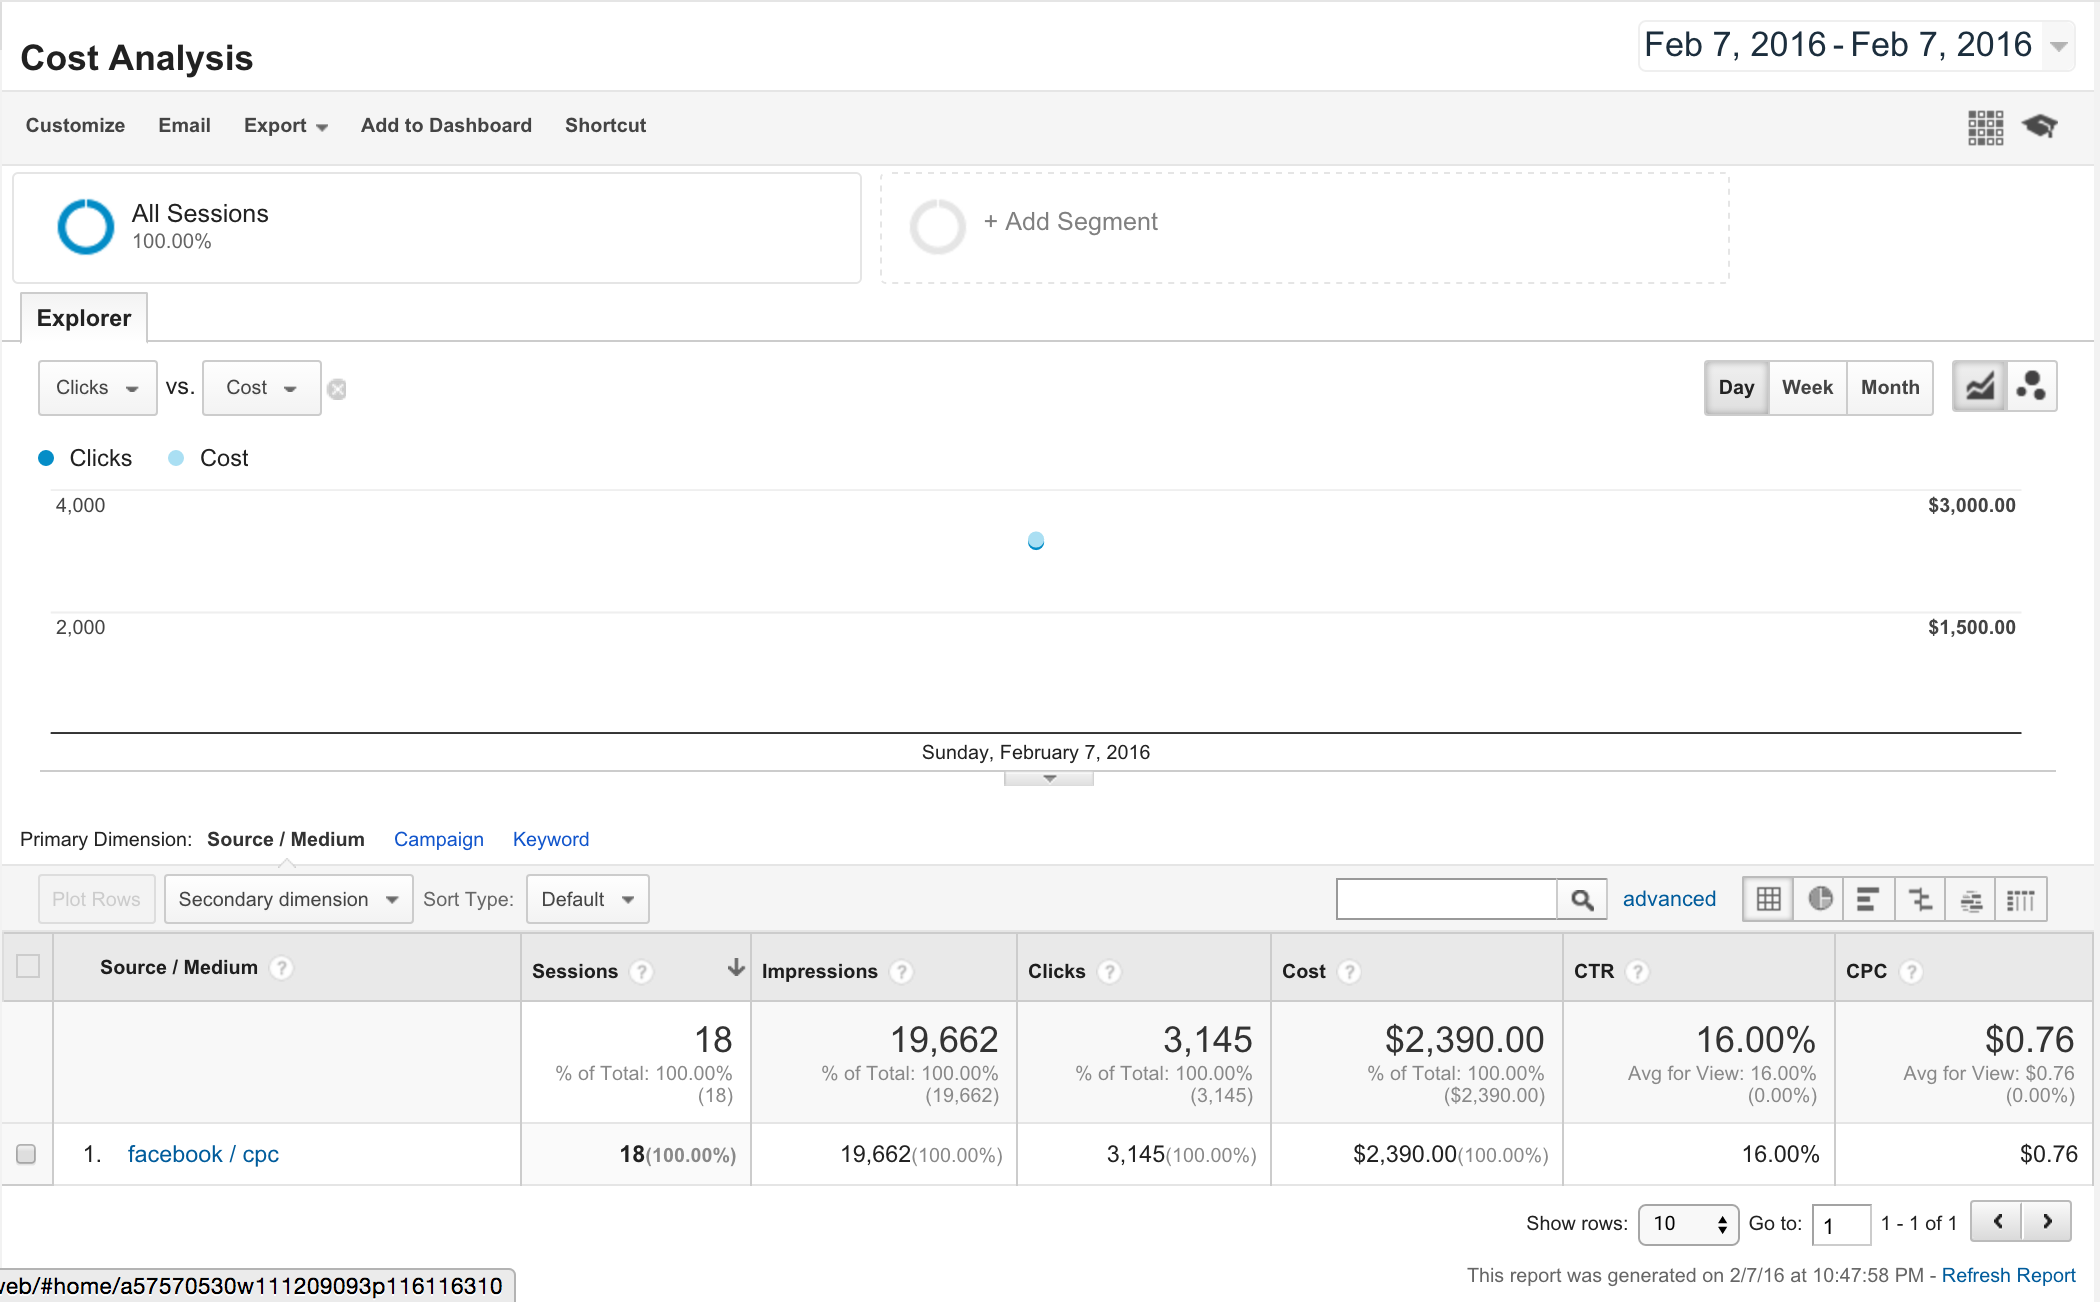
Once you’ve uploaded your cost data, you should be able to see the results in the Cost Analysis report, as well as in the MCF reports. You can also create a Custom Report to analyze your shiny new cost data.
Your Salesforce data will behave a little differently; Google Analytics will populate the data you’ve provided in association with your Client IDs you specified only after a session from said Client ID is recorded. So, if your visitor never returns after submitting a Salesforce lead, their Salesforce ID will not show up in the reports.
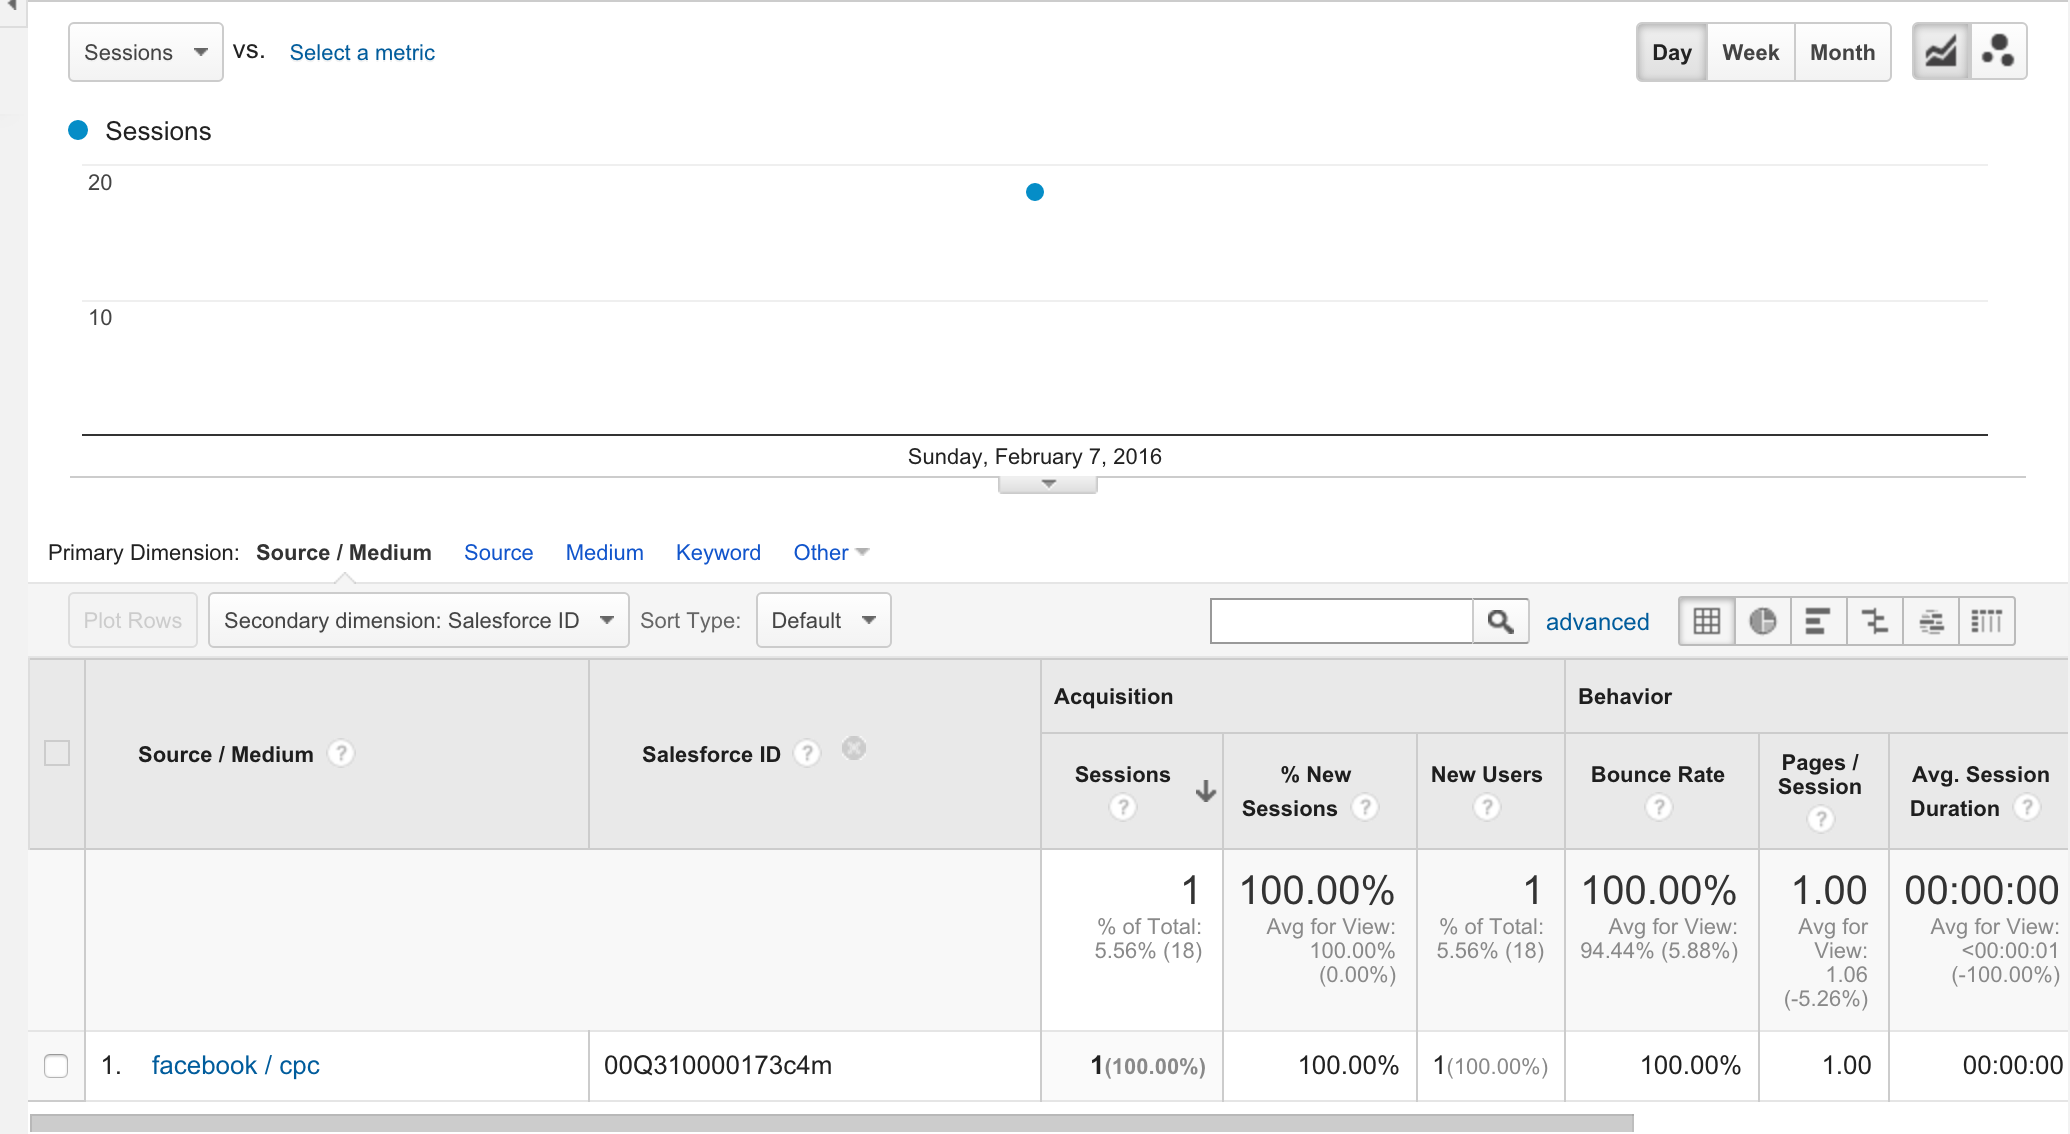
This applies to other keys, too; your data will not be populated retroactively. For this reason, it’s often a better idea to use a non-interaction Event via the Measurement Protocol in order to send in custom data to Google Analytics.
What data sources would you like to import into Google Analytics? Share in the comments below.


