Get The Recipe: Hover Tracking In Google Tag Manager
Question: Can we track hover events?
Answer: Yes, with our Google Tag Manager recipe!
What is the Hover Listener Recipe?
Out of the box, Google Tag Manager is pretty flexible. Several types of triggers are available that listen for certain actions or events, such as clicks, form submissions, history changes and more (read Zee’s post for a more in-depth look at triggers) and can be used to fire tags.
But, Google Tag Manager doesn’t automatically listen for some things, such as hover events.
Dorcas wrote a great post about this limitation a few years ago and we’re still in the same boat – we need a custom solution to track when users are hovering over elements on our site.
To make it even easier for you, we have created the Hover Listener recipe, which you can simply import into your own GTM container. This recipe doesn’t include any tags or triggers, so you’ll need to do some additional configuration to start seeing hover data in Google Analytics.
Download the Hover Listener Recipe
How to Use the Hover Listener Recipe
1. Modify the {{Constant – Hover Listener CSS Selectors}} variable
In the variable, you can specify a list of any CSS selectors where you want to listen for users hovering.
You can find this variable, along with everything else included in our recipe, in the LunaMetrics Hover Tracking Plugin folder.
If you’re not familiar with CSS selectors, they are patterns that you can specify to match different elements. They can be used within GTM and provide a ton of flexibility! Skip down to some examples if you need a refresher, or check out a few of these other great resources:
- http://www.w3schools.com/cssref/css_selectors.asp
- https://developer.mozilla.org/en-US/docs/Web/Guide/CSS/Getting_started/Selectors
CSS Selector Examples
Let’s say that I want to track when users are hovering over a certain element on one of my site’s pages. By inspecting the element using the Chrome Developer Tools panel (or Web Developer Tools in Firefox), I can see the different elements and their attributes that I can use to create my selector.
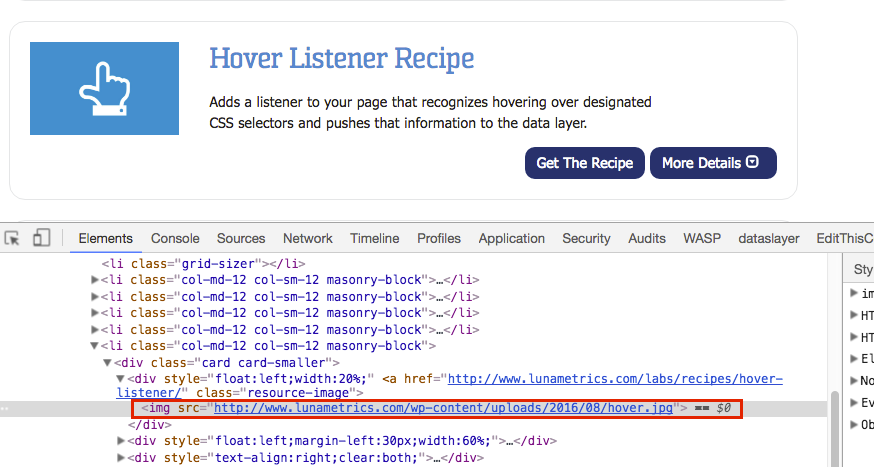
For example, on our GTM Recipes page, if I wanted to track hovers over the square images on the left side of each recipe, I could do that easily with a CSS selector.
A few basic selectors:
.class
#id
element > element (direct child)
element element (child)
Since the images that I want to target share a parent div element with a class of ‘resource-image,’ I can use a few basic selectors to create a CSS selector that matches all of them:
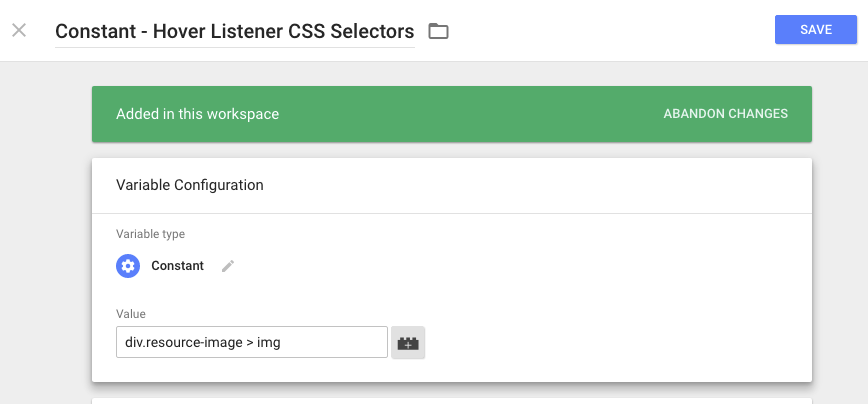
div.resource-image > img (matches any img element that is a direct child of a div element with a class of ‘resource-image’)
I’d then add that to my variable in GTM, like so:
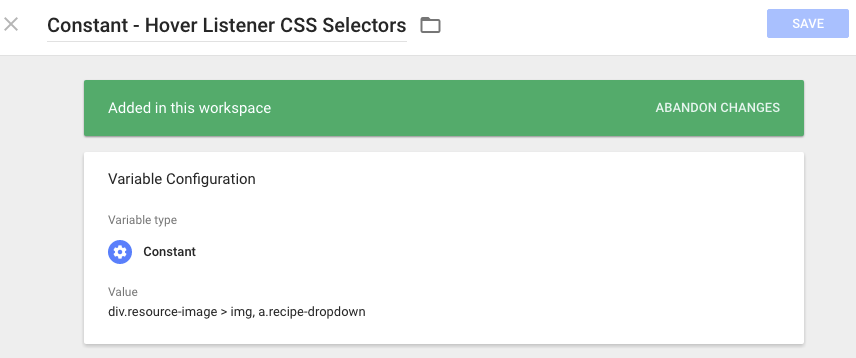
If you want to add multiple selectors to target different types of elements throughout your site, you can! Simply separate them with a comma in your variable. For example, if I had other elements on my page that I also wanted to track hovers over, I could just add another selector to the same variable.
For example, this would match our image elements and also any a element with a class of ‘recipe-dropdown’:
div.resource-image > img, a.recipe-dropdown
2. Make sure GTM is pushing custom ‘hover’ events
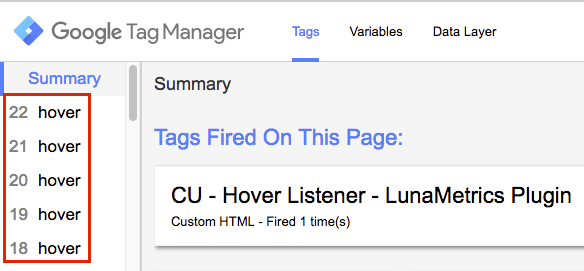
Our listener tag references the variable containing our CSS selectors. If a hover occurs over an element that matches our selectors, a custom ‘hover’ event is pushed to the dataLayer. You should see these in Debug mode!
3. Create triggers using the custom hover event
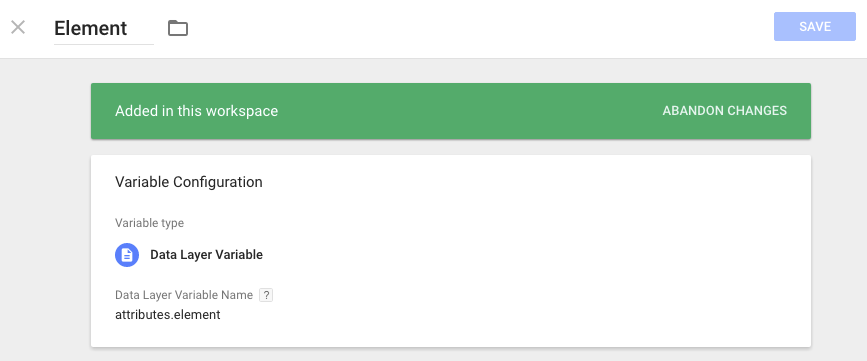
Now that we have a custom hover event, we can use it to create triggers and fire our tags. First, you’ll need to create a new custom variable for this, to get the attributes.element value from the dataLayer:
Then, create a Custom Event trigger that specifies hover as the event and your CSS selector. For example, the following trigger will fire a tag when a custom hover event is pushed to the dataLayer AND when the element that was hovered over matches the specific selector.
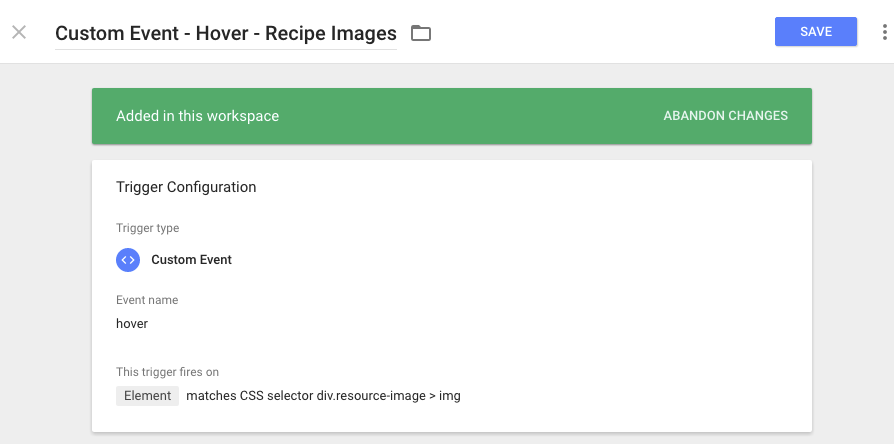
You can create a unique trigger for each CSS selector that you added to your variable, allowing you to fire different tags depending on which elements are hovered over.
Why Do We Care About Tracking Hovering?
Hover tracking can provide insight into intent and help you discover where users tend to focus or get confused. From our example, we may be testing the idea that users mistake the square images as buttons, and frequently focus on them before clicking other links. This might lead us to make these images navigable or change our calls-to-action on the page.
Some of you may already be thinking about ALL the hovering you want to track, for all the elements on your site. But, before you begin tracking hovers on different elements throughout your site, ask why you want to track this in the first place, and what questions this data can help answer. Just like with tracking other user engagement, there should be an objective and strategy behind collecting hover data, and a plan for visualizing it.
Have some exciting ideas for hover tracking on your own site? Share them below!