Programmatically Add Filters To Many Views In Google Analytics
We love to develop and use hacks that make our lives easier. This is especially true when it comes to streamlining massive, enterprise configuration changes that would otherwise require a large amount of manual clicking around to complete.
Ultimately, hacks save our clients money, our project hours, and a lot of unnecessary stress for everybody. This hack involves a little bit of JavaScript plus some view naming convention and organization on your part.
Credit goes out to my colleague Dan Wilkerson who came up with the idea for this hack!
Overview: How it Works
The situation: you just added a TON of new views to Google Analytics (GA). They all need the same filters applied to them – and all of the filters need to be in the same order for every view.
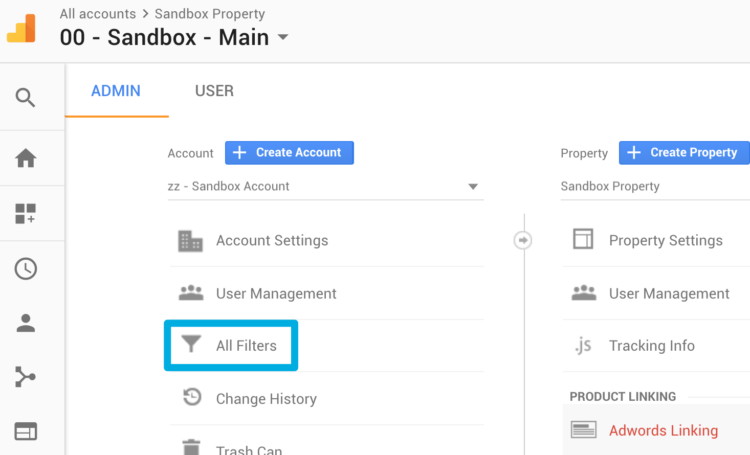
This hack will allow you to select multiple views with the same prefix, suffix, prefix-suffix combination, or a given string value from the All Filters menu in GA:
We always recommend naming your Views explicitly with the name of the property or website and usually, some sort of Prefix to help with ordering and make it easier for others to find what they need.
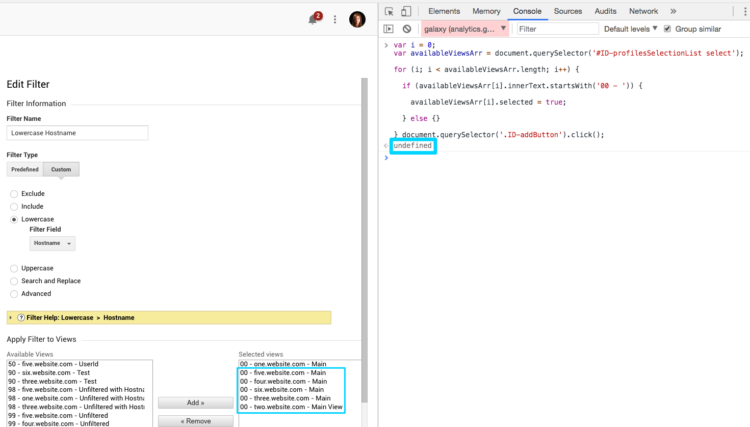
You can run this code while looking at the configuration for a single view. It will loop through the list of the filter’s “Available views” and will highlight and move all of the views that you want the filter to be applied to into the “Selected views” column:
Who Needs This Hack?
Enterprise accounts
Enterprise accounts generally consist of many properties with iterative views, possibly even across different GA accounts. Always follow a consistent naming convention when naming iterative views!
If you’re dealing with an enterprise account, the concepts covered in this post will likely be useful to you even if the hack itself is not.
Smaller accounts
Non-enterprise accounts can benefit from this hack as well. It allows filters to be easily applied across views and can help to speed up even simple GA implementations.
However, manually adding filters to views in smaller accounts may be faster than trying to implement this hack. If you aren’t wrangling a large number of views, I would suggest trying the manual approach first and only switching to this hack if you find the configuration to be time-consuming.
Why Would You Use This Hack?
- Ease – just use our spreadsheet and you won’t even need to write the code yourself.
- Efficiency – can save A LOT of time.
Step-by-Step: How it Works
1. Make Sure Analogous, Iterative Views Are Named So We Can Reference Them at One Time
Prefixes and suffixes for view names are very useful in keeping like-views organized within a single property. If you have many properties with analogous views, prefixing them with the same value will allow you to reference all of those views at once with the following code.
There is also an option in the spreadsheet to look for any given string (the last two columns in the spreadsheet). This string value isn’t required to be a prefix or suffix. Be careful using this option, as it will select any and every view that includes the text that you specify.
2. Use This Spreadsheet to Generate Code
Open up this Google Sheet and make a copy:
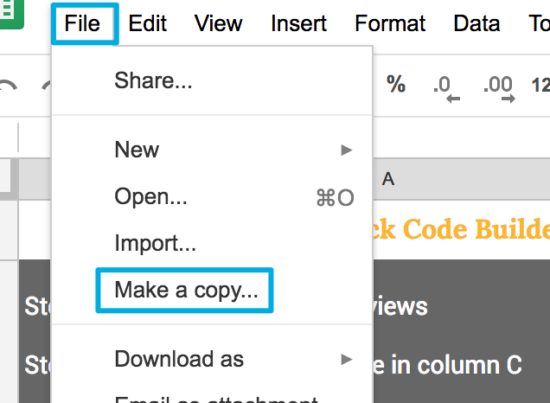
Type your view prefix into column B and the code necessary to select all of the views that begin with that prefix will be generated in column C. There are also options for view suffixes (columns D and E), prefix/suffix combinations (columns F, G, and H), and a string that can be anywhere in the view name (columns I and J).
Copy the code generated by the spreadsheet for the option you need. I’ll be using the prefix option as aanexample.
3. Go to the All Filters Menu in Google Analytics
Go to your account in Google Analytics. Click into the All Filters menu:

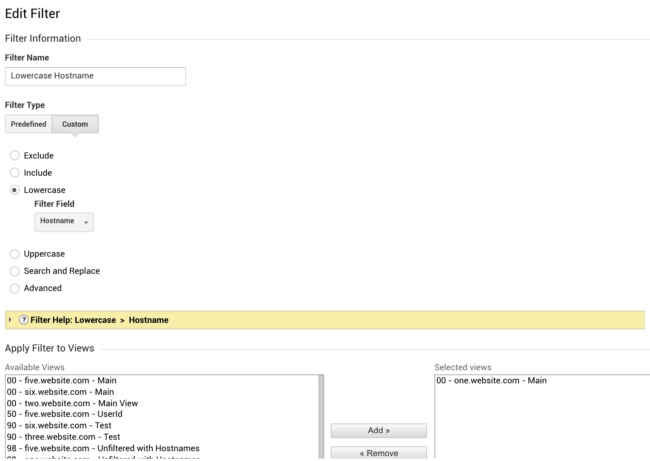
Click into the first filter you want to apply to all of your views:
4. Copy Code and Paste into Console
From this page, hit Command+Option+J (Mac) or control+Shift+J (Windows) to open the Console panel of developer tools.
We frequently use Chrome Dev Tools to implement hacks. This tool allows you to interact with page elements in order to troubleshoot and develop code. We can also use Dev Tools to manipulate the elements of a page, changing how they look and function locally. This is what we’re going to be doing with this hack!
Paste the code from the spreadsheet into the Console:
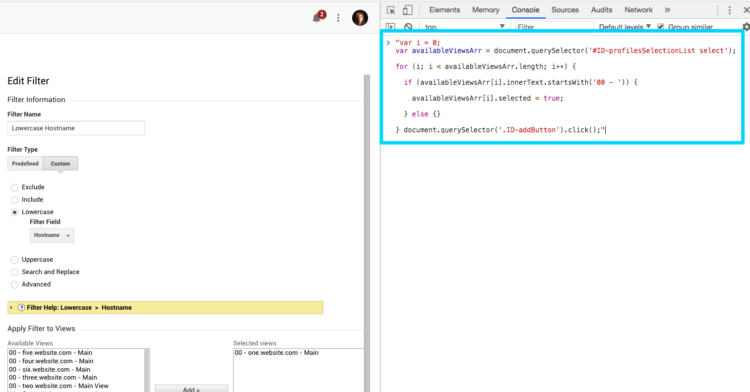
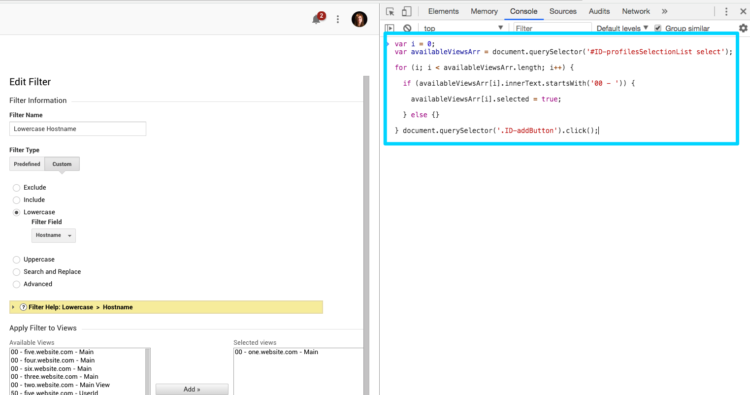
Remove the quotation marks from the very beginning and end of the code:
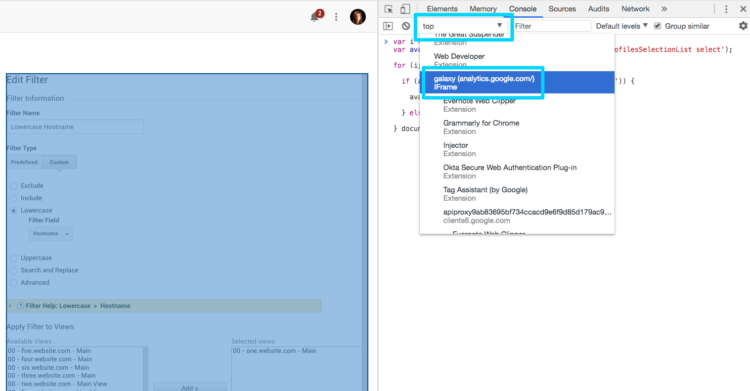
Change the context of the Console from “top” to “galaxy (analytics.google.com/)”:
Click back into the Console and hit enter to run the code:

You should see “undefined” in the Console because the code is interacting with the page elements (as opposed to printing something to the Console). You should also see your corresponding views added to the “Selected views” column.
5. Click Save!
Click “Save” and now the filter has been applied to all of those views!
6. Repeat Steps 3-5 for Each Filter You Want to Add Across Your Views
Make sure you’re applying filters to views in the correct order. You can rearrange your filter order for each view from the Filters menu at the view-level, but adding them in the correct order initially can save you a lot of time.
The example above is a simple one. If all of the views you want to add a given filter to are prefixed with the same prefix, it may be easier to select them all manually in the “Available views” column instead of running this code in order to select them. However, if they’re suffixed with a value, if you need to pull in prefix-suffix combinations, or if you’re looking for a string value that can appear anywhere in the view’s name, this hack can save you a lot of time when it comes to configuring filters.


