Getting Started with Google Tag Manager Custom Templates
Google Tag Manager has had some major updates in the past several years. From redesigns and renames, to new functionality for enterprise organizations, the Google Tag Manager (GTM) team is constantly improving.
Welcome to the next big change. For those who haven’t heard — the release of Custom GTM Templates was kind of big deal. While some changes may be minor, this particular change is significant, as evidenced by the amount of discussion and content already created. Personally, it took me a couple of hours to really internalize the impact this change will have on the way we work with Google Tag Manager.
As a reminder, Google Tag Manager has long supported three native tag types: Google tool tags, third-party tags from approved tag vendors, and then the Custom tags. The built-in Google and third-party tags took the guesswork out of adding tags to your site, making it simple for even a beginner to add in a few details and publish a tag to their site, hiding all the HTML and JavaScript. If the tag you needed wasn’t included, you were left with the Custom options.
Excitingly, gone are the days where the Custom HTML and the Custom Image tag type are your only options for non-native tags. GTM community and MarTech vendors can now create and share their own tag and variable templates, following a strict process to reduce risk and take advantage of features already built into GTM. This enables the GTM user to configure these new tags using the familiar GTM UI.
If you are totally new to the concept of custom templates and are interested in creating your own, I recommend reading Simo Ahava’s Custom Template Guide for Google Tag Manager, first. In typical fashion, his post is comprehensive and should be bookmarked for repeat reading.
GTM Custom Templates vs GTM Recipes
While Google Tag Manager has many tags included, there is and will always be additional functionality that can be added. In the past, Bounteous helped lead the concept of Google Tag Manager recipes, downloadable JSON containers that add pre-built solutions to common challenges like video tracking, AJAX listening, and more. From there, the community exploded with more and more examples of sharable, reusable, and editable Recipes.
While Recipes fill a vital role, they’re often used to add Trigger functionality to GTM, listening for something happening on the page or generating data layer pushes that can be used to trigger specific tags.
Recipes also are a bit more homegrown, taking advantage of the Custom HTML tag to add additional functionality and relying on the recipes’ authors to use create functional and safe code.
GTM Custom Templates go a step further. The Google Tag Manager interface now supports an entire Template Editor interface, to control which fields are included, what code is added, and what permissions are needed.
It’s safe — the code that gets added uses a “sandboxed version of JavaScript,” which means the GTM team has gone to lengths to make sure that these templates can and should be publicly shared.
"Sandboxed JavaScript is a limited subset of JavaScript that allows Tag Manager's custom templates to interact with web pages safely and securely."
GTM Custom Template Walkthrough
So, why might we need to use a Custom Template?
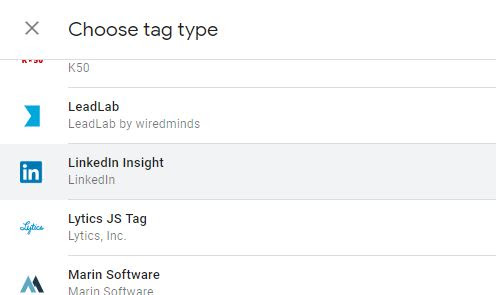
Let’s take LinkedIn for example. If you’re running any sort of LinkedIn campaigns to drive traffic to your site, you’ll want to make sure you’re able to measure how they’re performing. Let’s check the Google Tag Manager Tags menu to see what’s available:
We already have the site-wide Insight Tag, why would you need a Custom Template in Google Tag Manager for LinkedIn? The short answer — to go beyond pageview tracking.
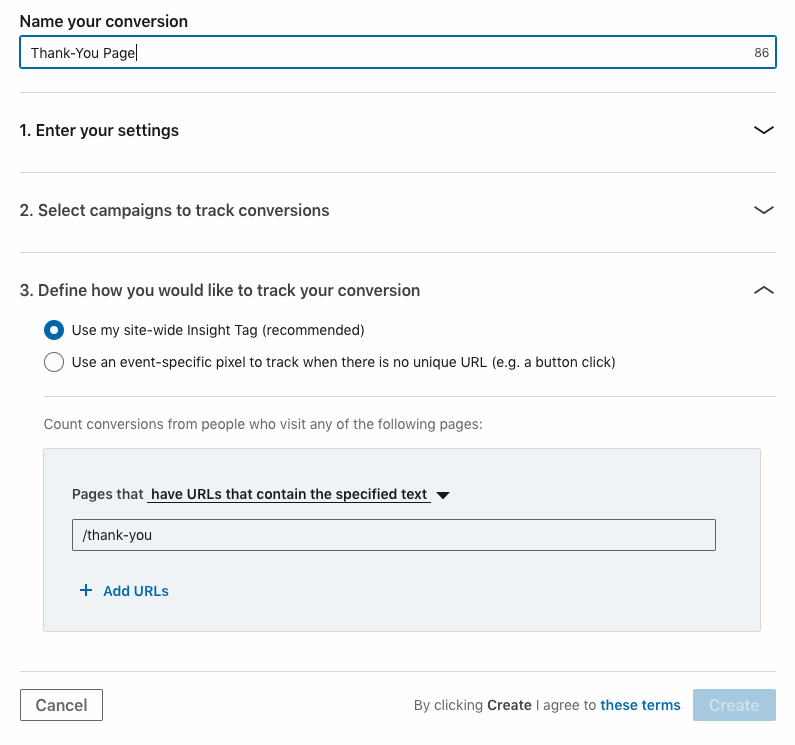
Your basic LinkedIn Insight Tag is meant to fire on all pages and enables you to define URL-based conversions. If you drive users to a /thank-you page after a conversion happens, you can simply set up conversion tracking using your LinkedIn Insights Tag.
In all other cases, you have to fire an event-specific pixel.
In the old days, you’d go ahead and either paste the full code into a custom HTML tag or paste the full URL into a custom image tag.
Pretty cumbersome and seeing HTML might freak out some non-technical marketers. Let’s make this easier.
Easy Entry for GTM Custom Templates
When a Custom Template is created, the author can decide what fields are important. Rather than asking people to copy and paste code, using a Custom tag, and potentially messing something up in the middle, asking only for the values needed within the context of the tag helps reduce risk.
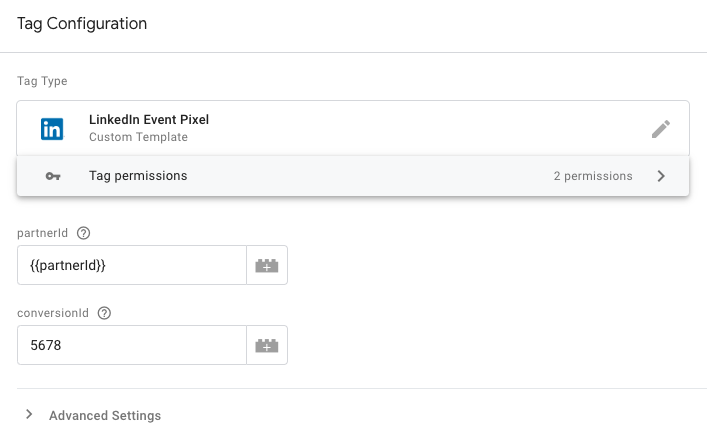
With our custom GTM template for LinkedIn events, we’ve set it up so that all you have to do is insert your LinkedIn partnerId (pid) and the conversionId. Both are present in the URL of your event pixel.
<img height="1" width="1" style="display:none;" alt="" src="https://dc.ads.linkedin.com/collect/?pid=1234&conversionId=5678&fmt=gif" />
In the example shown below, I store the partnerId in the GTM variable {{partnerId}} to avoid having to copy and paste the same Id over and over again.
Instead, you could always just paste the actual partnerId in the relevant field, of course. Depending on the number of LinkedIn tags in your GTM container, this will become hard-to-maintain if the partnerId changes at some point.
Then, just like with all other Tags, you’ll add the appropriate trigger to your tag.
In my example below, a custom GTM event fires, whenever a form is submitted, which serves as the trigger for my LinkedIn Event Pixel.
Pretty easy, right?
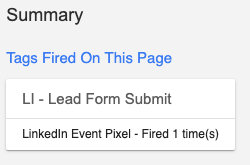
Last, but not least, these custom templates work with the GTM preview mode to make sure your tag fires appropriately.
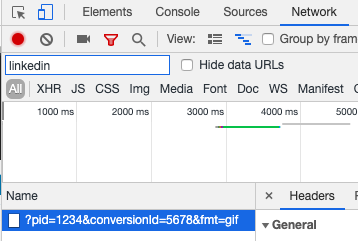
We can also validate that the request is being sent to the LinkedIn ads server, using the network tab of your browser’s developer tools.
A search for “linkedin” will show you the relevant requests.
As you can see in the screenshot below, the 2 parameters pid and conversionId are correctly populated.
How Do I Add a Custom Template to Google Tag Manager?
Another highlight of custom GTM templates is the ability to export and import templates in a much more streamlined process than we’ve used with adding GTM Recipes. Again, using our LinkedIn Event Tag as an example, the process for importing is just a few steps:
1. Download the GTM template.
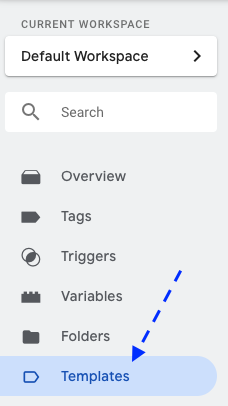
2. Open the Templates Menu in GTM.
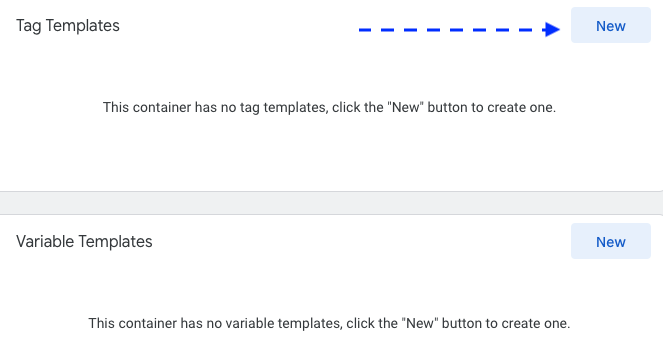
3. Create a new Tag Template.
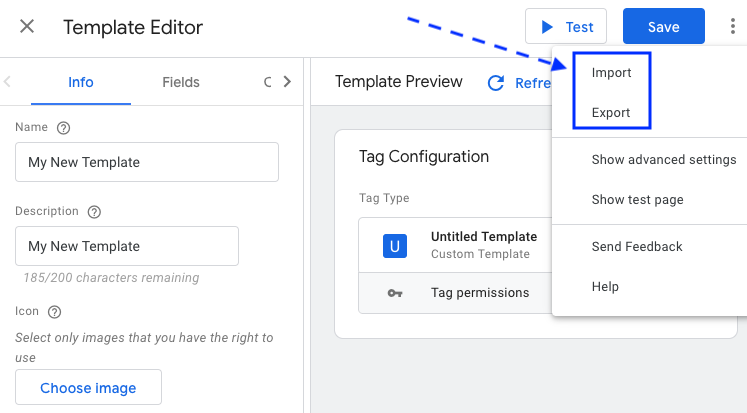
4. Click on the 3-dot-menu to open the additional settings.
5. Choose ‘Import’ and upload the GTM template for LinkedIn event tracking.
6. Exit the Template Editor and begin using the Custom Template in your next tag.
Congratulations, the LinkedIn Event Pixel is now part of your available tag types.
How and where you’ll find these Custom Template will continue to change over the next few weeks and months. For now, you’ll likely encounter blog posts or repos of GTM enthusiasts collecting and distributing Custom Templates from around the web. (Simo has his repo already started!) As we continue to create Custom Templates at Bounteous, we’ll publish them on our blog and link to them in our Resources section.
I would hope that companies that rely on site tagging (like LinkedIn) would begin making their own templates and updating their support documentation. At some point, it would be reasonable to expect a community-supported, partner-curated collection of templates that Google would maintain, though that may take some time and may conflict with the existing approved tag vendor process.
For now, we’ll continue to watch the industry and the exciting new templates that will expand the functionality and ease of use for Google Tag Manager!
Are you curious what’s going on behind the scenes in Custom Template creation? Keep reading!
How Do You Build a Custom Template for Google Tag Manager?
Most GTM users will likely never need to build their own template. For those that do build something, here’s a brief introduction to various screens and items that we used to build our LinkedIn Event Tag template.
Fields
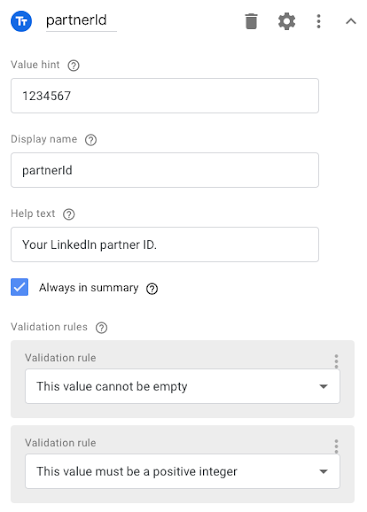
The fields screen is used to create the input fields for your Template. This is what the user will see after choosing your Tag or Variable.
For our sample Custom Template, we have the two text input fields partnerId and conversionId.
Input fields are always part of the summary and have
- a value hint
- a user-friendly display name
- a help text
- validation rules
In our case, we’ve set it up that both input fields can’t be empty and only accept positive integers as values.
Code
The code screen is where you’ll input your JavaScript code, again, using that sandboxed version of JS.
For our code, I’ll break down how I put together the LinkedIn tag.
First, we need to enable the ‘sendPixel’ API.
const sendPixel = require('sendPixel');
Then, we’ll assemble the tracking URL in a JavaScript variable.
var trackingUrl = 'https://dc.ads.linkedin.com/collect/?'+'pid=' + data.partnerId +'&'+ 'conversionId=' + data.conversionId +'&fmt=gif';
Now that we assembled the URL, we can send the pixel.
sendPixel(trackingUrl,data.gtmOnSuccess,data.gtmOnFailure);
Permission
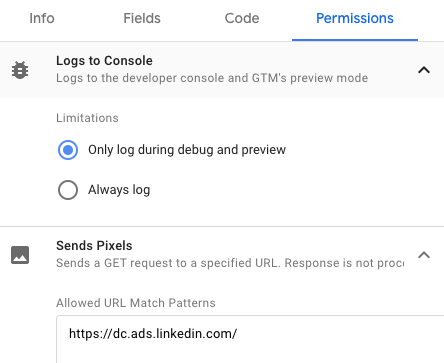
Based on the code you submit, GTM will ask you to confirm what permissions are needed by this particular template.
This template only requires 2 permissions.
- Logs to Console: Logs only during debug & preview
- Send Pixel: Allows the LinkedIn ad server URL
Save, Test, Tweak, Export, and Distribute
From there, you’re ready to roll! That’s all the magic that happens behind the scenes. Pretty straightforward, right?
This post glosses over the tough part — getting the code right, testing and debugging, etc. but the process is easy to master. With the right adoption by companies, and with the eager support of the GTM community, Custom Templates are poised to increase the value and adoption of Google Tag Manager even further.
