Data Import Step‑by‑Step Guide For Google Analytics

Data Import is a feature that helps you combine data inside of Google Analytics with data you that you have outside of Google Analytics. Ideally, you’ll be able to use more personalized information inside of Google Analytics to help find meaningful and actionable insights. Not sure yet? Here’s an example:
By default, Google Analytics can tell us certain information about the pages people view on our site:
- page path (including query parameters)
- subdirectory levels
- title
- hostname
But what if we have additional information about our pages we want to see in Google Analytics? For example, a content site may have a lot of interesting meta-information about its pages:
- author
- content type
- content tone
- publish date
- publish hour
- publish day
- publish week
- publish month
- publish year
- section
- sub-section
- headline
- sub-headline
- article category
- number of images
- number of videos
- character count
- word count
Data Import lets us add all the additional information we have about our pages, so we can segment the data in many interesting ways. Wouldn’t you like to know if pages with more images lead to a higher conversion rate on your site? Perhaps which categories or authors drive the most traffic?
More ideas and examples: 17 Ways to Revolutionize Your Reports with Data Import
Enough theory, just show me how to do it!
Below are the step-by-step instructions for data import.
1. Create custom dimensions
Because you’re adding data into Google Analytics, it needs somewhere to live. Primarily, this will be stored as a custom dimension (although you could also use custom metrics).
So before we start uploading data into GA, we need to create the custom dimensions first.
If you’ve never created a custom dimension before, follow our instructions for creating and editing custom dimensions and metrics.
2. Create the Data Set
A Data Set is a container that holds the data you upload to GA. It also defines the schema for the data import. The schema boils down to two important things:
- key
- location for uploaded data
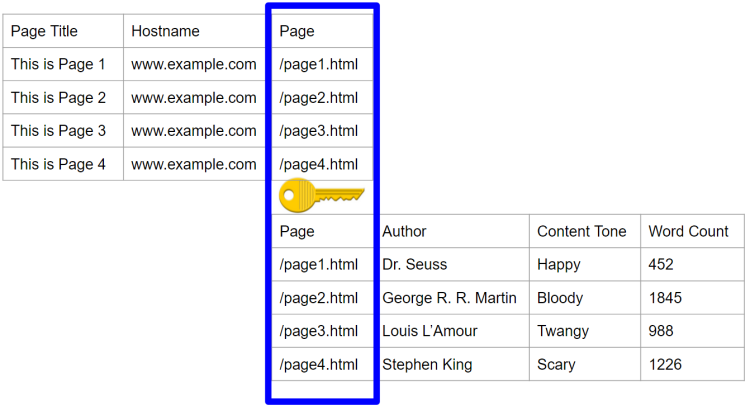
The key is a dimension on which you will join the data that already exists in GA with the data that you’re uploading. For example, you might use the Page dimension (which already exists in GA) to join additional information you have about the page (author, word count, etc.).
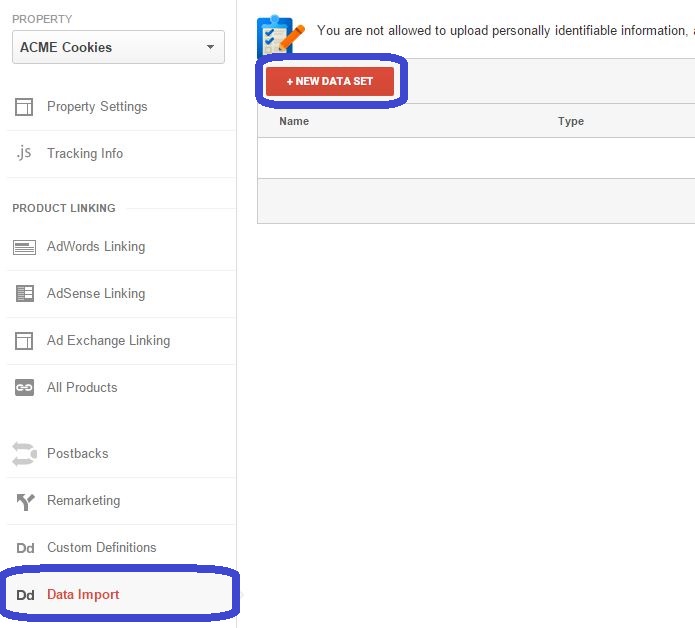
To create a Data Set, navigate to the Admin area of GA. In the middle column (Web Property settings), look down toward the bottom and click on the Data Import menu. From the Data Import screen, click on the button to create a new Data Set.
Next, choose the Data Set type. There are 8 options:
- Refund Data – help center article
- User Data – help center article
- Campaign Data – help center article
- Geography Data – help center article
- Content Data – help center article
- Product Data – help center article
- Custom Data – help center article
- Cost Data – help center article
Choose the appropriate type according to the data you’re uploading, then click to the next step. For help in understanding the different options for the Data Set types, explore the linked help center articles from Google.
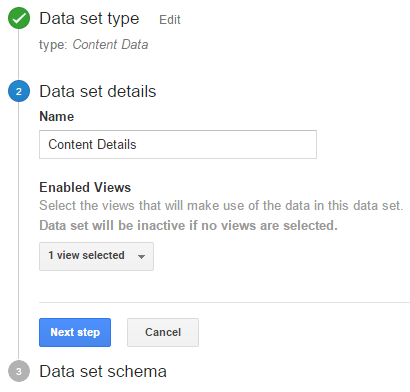
Next, give the Data Set a name and choose which Views this additional data will be available.
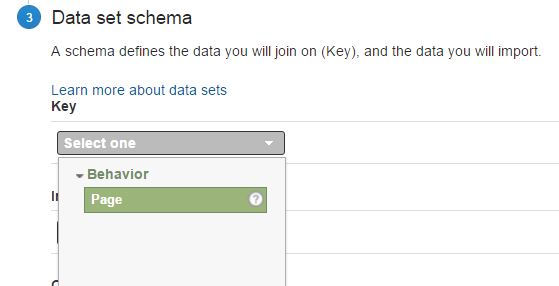
Next, you need to define the Data Set schema. This is just the key (the data that exists in GA and in the uploaded data) and the dimensions where the uploaded data will be stored. For the key, you’ll select from a list of dimensions in the dropdown. These can be standard dimensions in GA (like Page) and/or custom dimensions. The dimensions listed will be different depending on the Data Set type you chose.
Using our example from above, our final schema may look like the following:
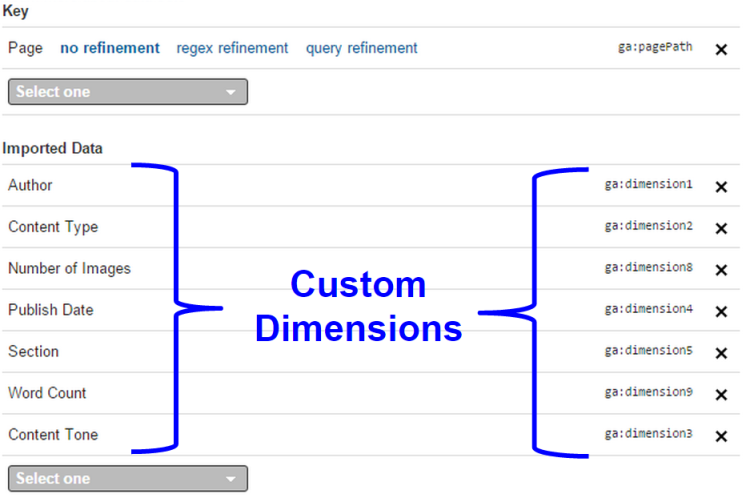
You’ll have an option to control how the uploaded data gets joined with the existing data in the Overwrite hit data / Import Behavior section. For example, you can specify whether or not the data that you’re uploading should overwrite data values that are collected as part of the hit. In other words, if you’re passing in the author name from your Google Analytics tracking on your site, do you want to use the value that is on the hit, or overwrite it with your uploaded value?
The options for Cost Data import are slightly different. You can choose whether duplicate data is added (summed) to previously uploaded data, or if it should overwrite previously uploaded data.
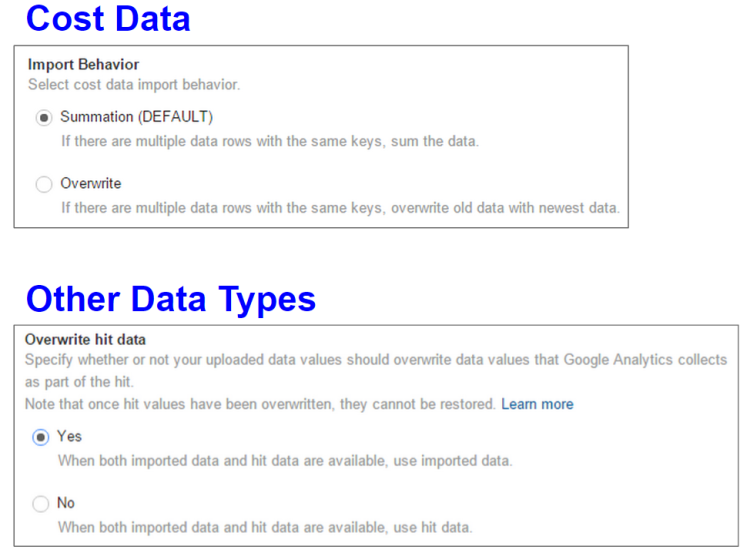
Once you’ve chosen these options, click Save. Now you’ll see two buttons – Get schema and Get Custom Data Source ID (for API users).
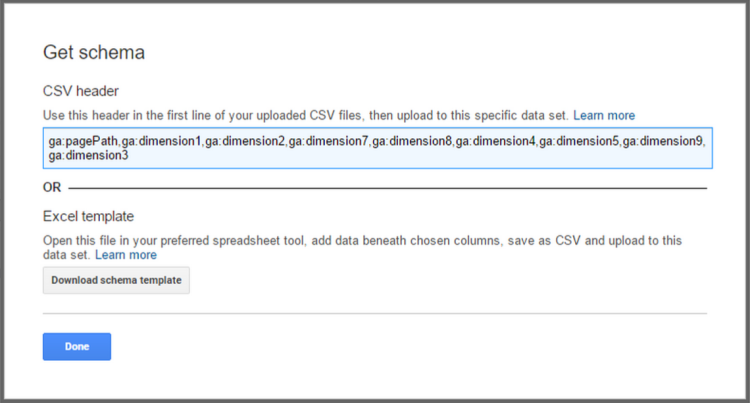
Click on the Get schema button.
This gives you the CSV header to use as the first line in your uploaded CSV file. Alternatively, you can also download an Excel template that you can fill with your data.
3. Create the CSV
Using either the CSV header or the downloaded Excel template, you can now build the file that you will upload. Using our example (and the Excel template option), you would have a file that looks like below:

If you’re using an Excel file, save it as a CSV after you’ve added your data.
4. Upload the Data
Once you have your CSV file with your additional data, there are two options for uploading it. You can use the Google Analytics Management API to upload data, or you can upload it manually. For our example, let’s keep it simple and manually upload our file.
If you have data that changes frequently, like new product information or new articles published, you may want to consider a more technical solution to automatically update each night.
First, from the Data Import screen in the Admin, click the Manage uploads link next to the Data Set into which you want to upload data.

Then, click on the Upload file button, choose the CSV file you created earlier, and upload it.
It’s that simple!
5. View data in reports
Uploaded data only gets added to your data during the processing stage. This means it will not be applied retroactively (Google would have to reprocess all your historic data, and that’s not going to happen). It will only be applied to hits as they’re being received. Also, it may take up to 24 hours before the data shows up in your reports.
Once you’ve uploaded your data and it has started processing, you’ll be able to see the uploaded data in your reports in a number of ways. Since your uploaded data is being stored in custom dimensions, you’ll be able to view it in all the same ways (secondary dimensions, custom reports, custom dashboards). For more information on how to access these values, check out How to Report Custom Dimensions in Google Analytics.
Things to keep in mind
There are several other nuances and FAQs of Data Import that are common. Here are the top ones:
- You need edit permissions at Web Property level to configure Data Import and Custom Dimensions.
- A good use case for data import is when you don’t want the data out in the open (viewable in the source code or by looking at the collect request). For example, you may want to see gross margin in GA for your analysis. This isn’t something you’d want to send along with the pageview hit, which is easy to see.
- Data Import does not apply to historic data. There is an option for Google Analytics 360, called Query Time import, which does join your uploaded data to historical data (with some limitations).
Published: September 21, 2017
Additional resources
- About Data Import (Google Analytics Help Center)
- About Custom Data (Google Analytics Help Center)
- Importing data into Google Analytics – Video (Google Analytics Academy)
- Data Import Developer Documentation
- Query Time Data Import in Google Analytics For Historical Reporting


